


|
Installing NOTCam filters
All NOTCam optical elements and holders not mounted in the
instrument are located in the NOTCam white plastic tray in
the clean room in the service building.
We have the following sets of filter holders:
Type 1
black |
Inner diameter: 25.5 mm
Thickness: 3.47 |
This was the set that arrived with NOTCam. Useful only
for the polaroids and the 1mm thick KG4 glass filter.
|
Type 2
grey |
Inner diameter: 26.1 mm
Thickness: 6.05 |
Useful for relatively thin filters, i.e. filters
thinner than 5 mm.
|
Type 3
grey |
Inner diameter: 25.4 - 25.7 mm
Thickness: 6.98 |
Must be used for the thickest filters of ~ 5mm.
|
How to install filters in NOTCam:
- Use gloves! all the time. Finger prints
take ages to disappear. When using gloves, statics is more of an issues.
Therefore, always use earth straps when
touching the instrument.
- When NOTCam has been opened in the clean room and the radiation shield
has been taken off, you need to start dismounting several components of
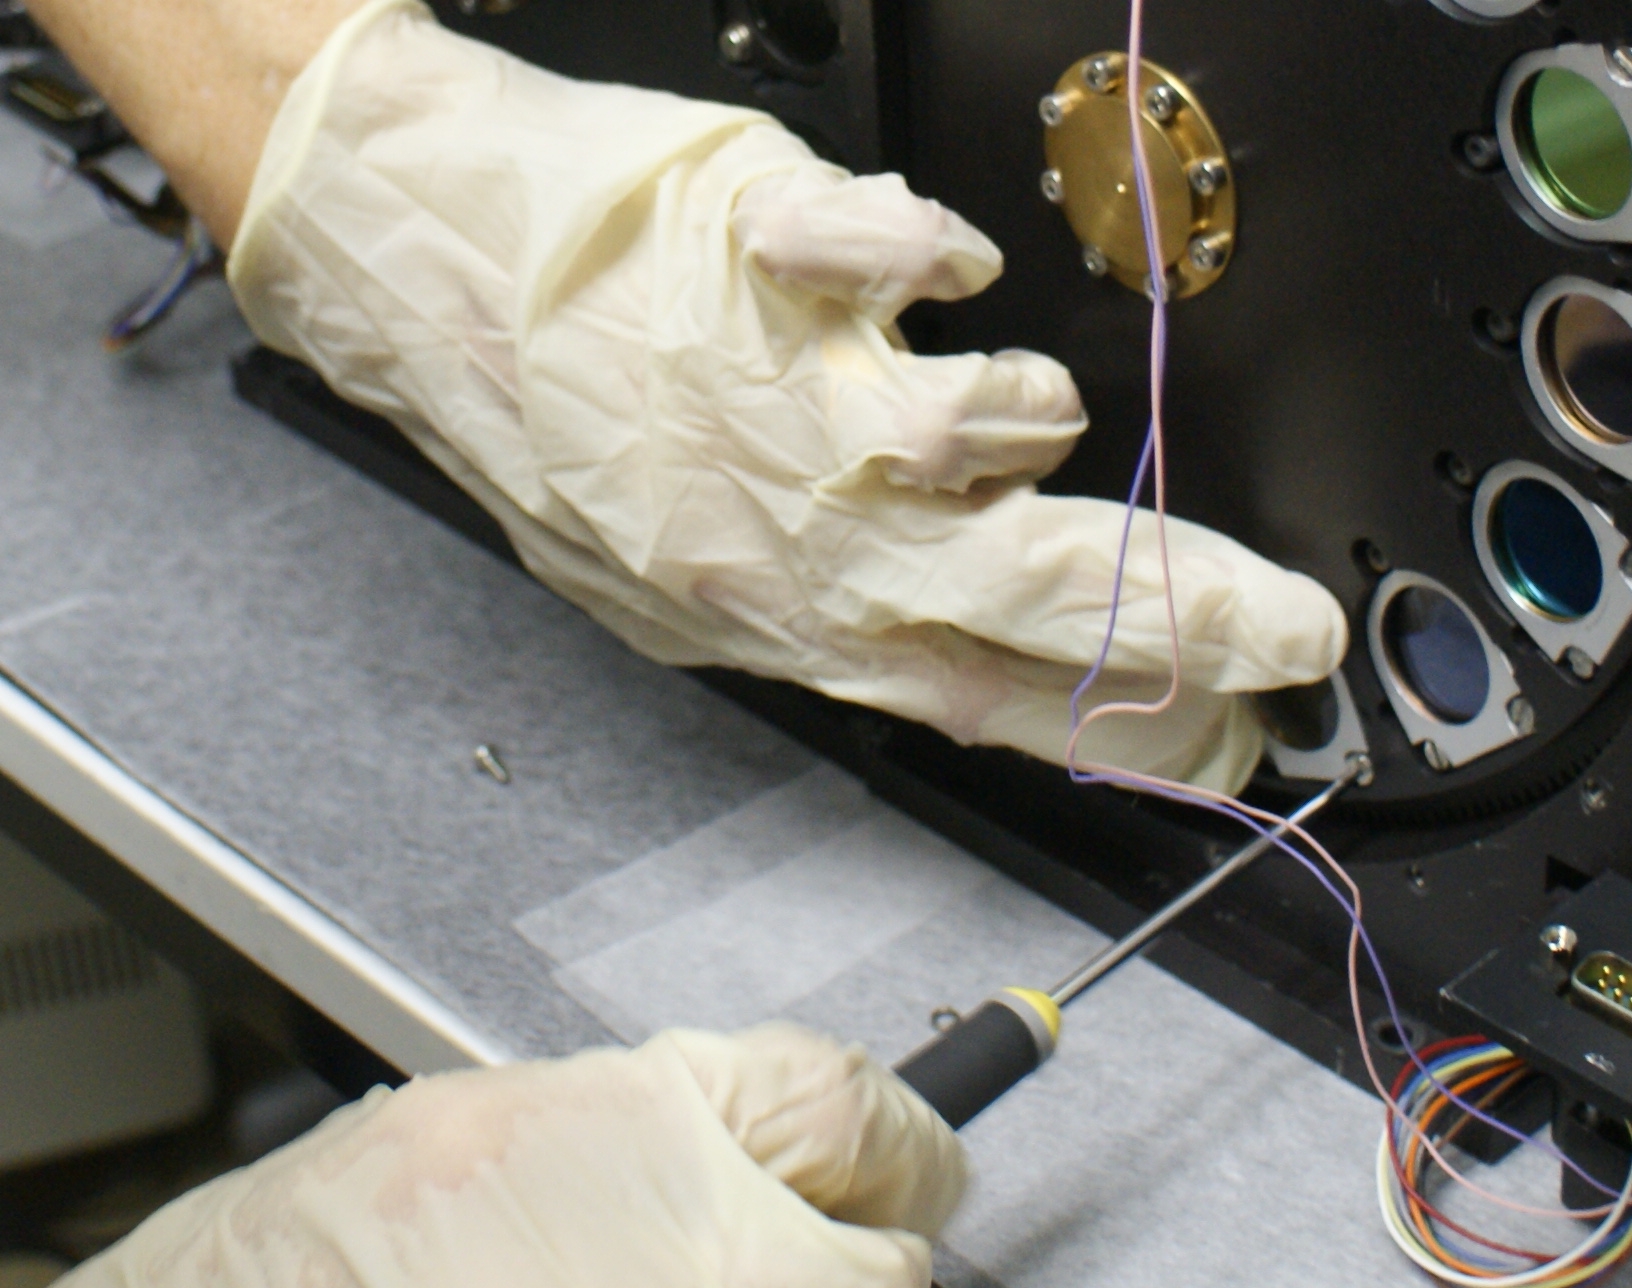
the optical table. Before that, all wires must be disconnected. Note that
some wires go with the units, while most remain on the instrument side.

- The aperture wheel (unit A) is fixed to the cold table with 4 screws.
When unscrewed you can lift off the whole unit and place it carefully on
a table.
- Then you need to remove the collimator and shutter unit, which is also
fixed with 4 screws to the cold table. This one is heavier. Lift it off and
take care with the optical surface!
- Now you need to dismount the whole central wheel unit, which contains
the two filter wheels (units B and C), the stop wheel (unit D), and the
grism wheel (unit E). The two filterwheels are closest to you (i.e. towards
the entrance unit). The central wheel unit is fixed with 5 screws to the cold
table, 3 in front, and 2 on the back side. One of the backside screws can be
a challenge to get to. The unit is heavy. It is preferrable to have it placed
horizontally at your working table to open up the filter wheel lids. The
right one is usually a bit tight.
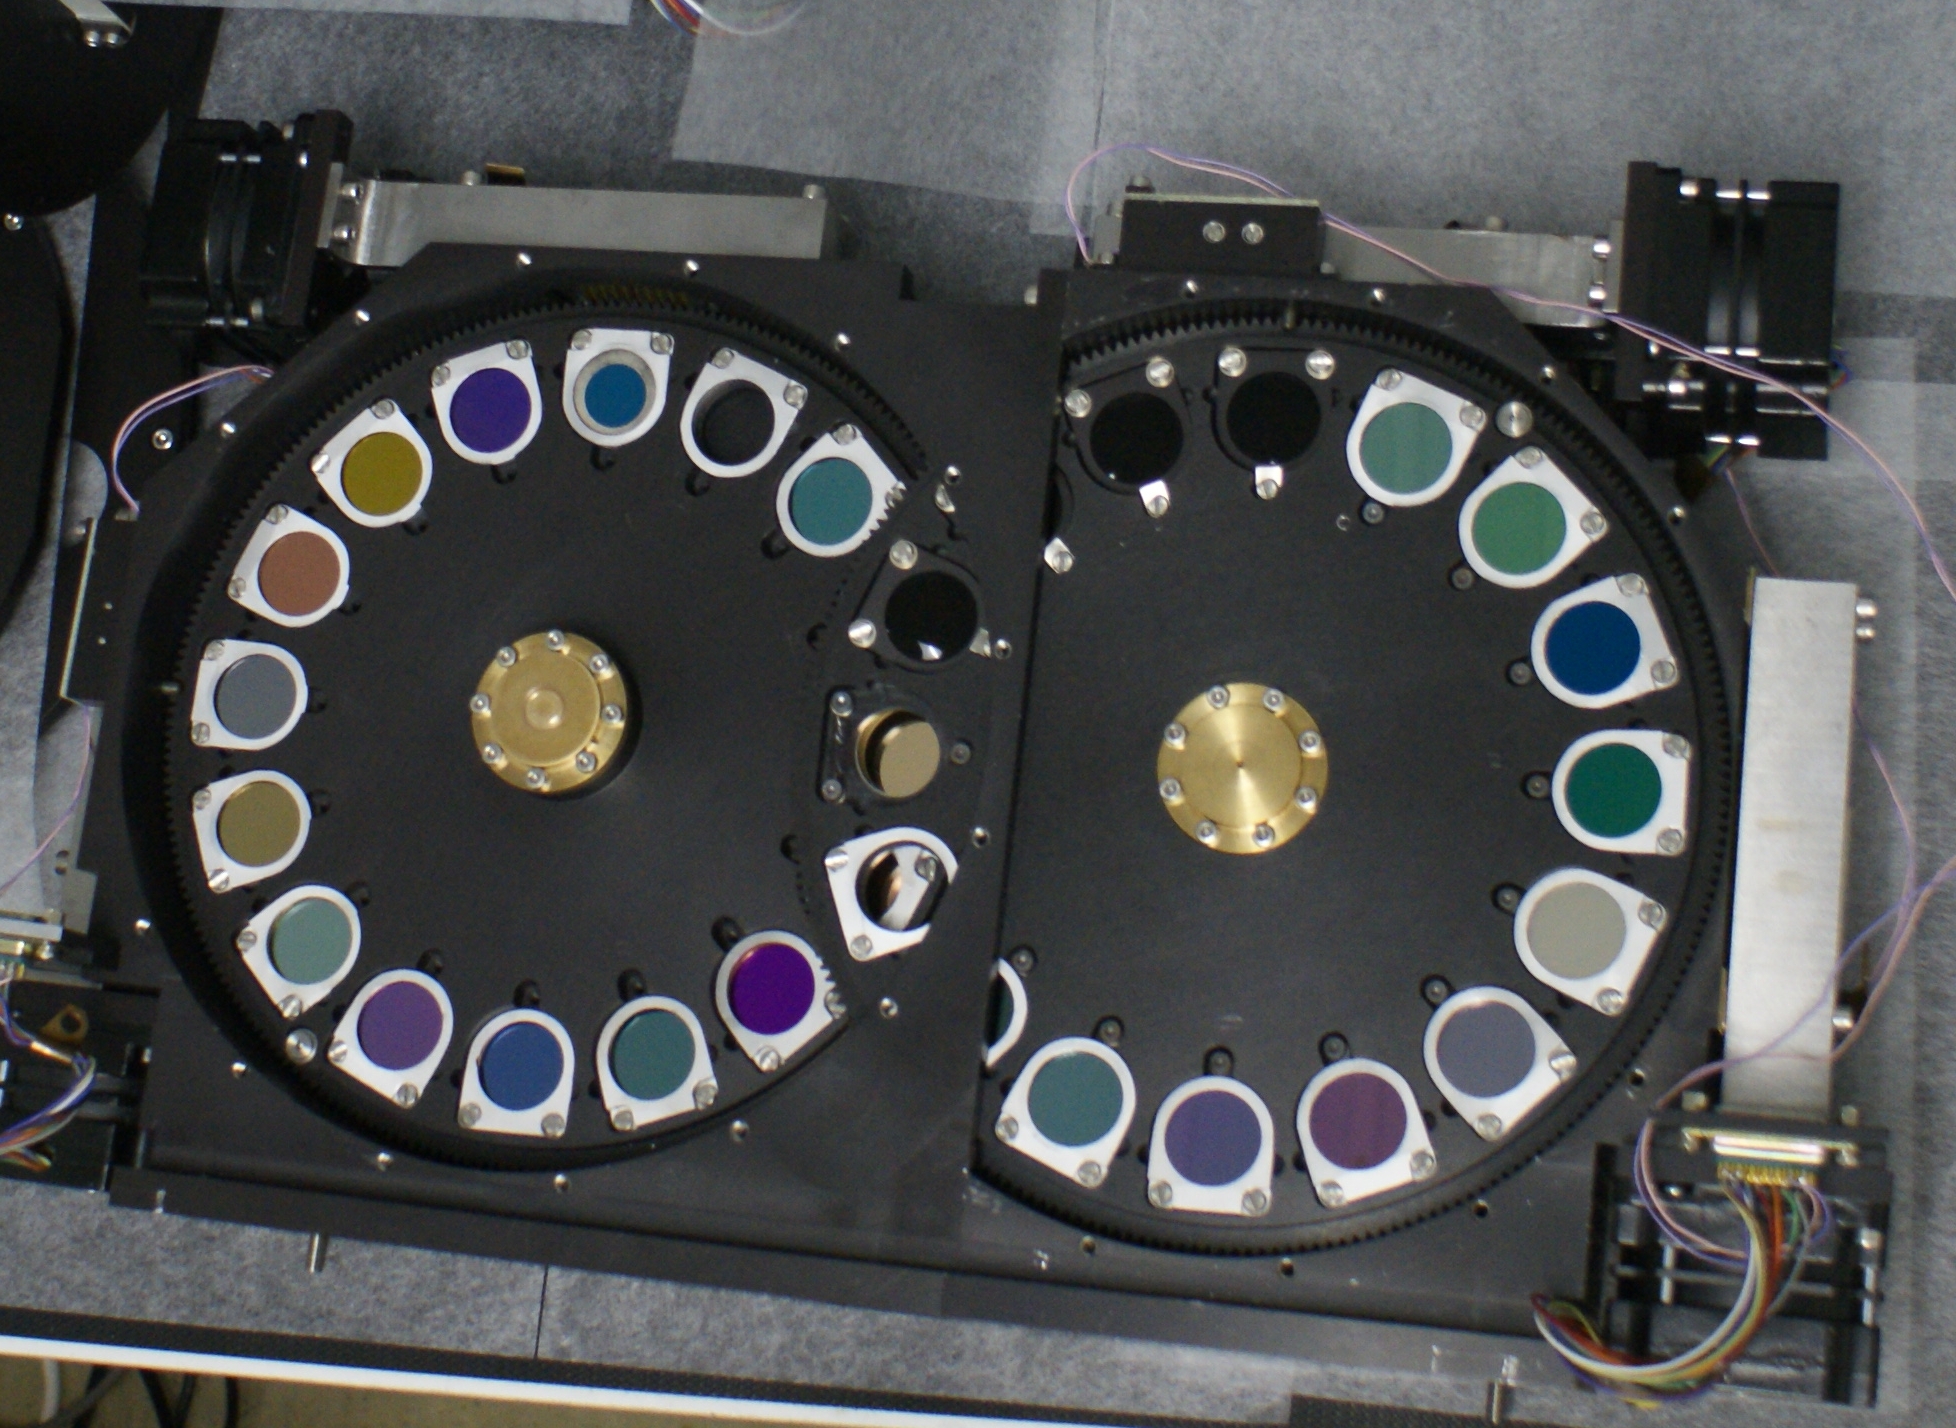
- Make sure you correctly identify the wheel position. Note that when
you have the two wheels in front of you, with C (filterwheel 2) to the left
and B (filterwheel 1) to the right, the position numbering of wheel C
increases in counterclockwise direction, while the numbering of wheel B
increases in clockwise direction! For both wheels the slot numbering should
be evident, however, as two slot positions are marked (number is scratced
into the wheel metal).
The
Current NOTCam Setup.
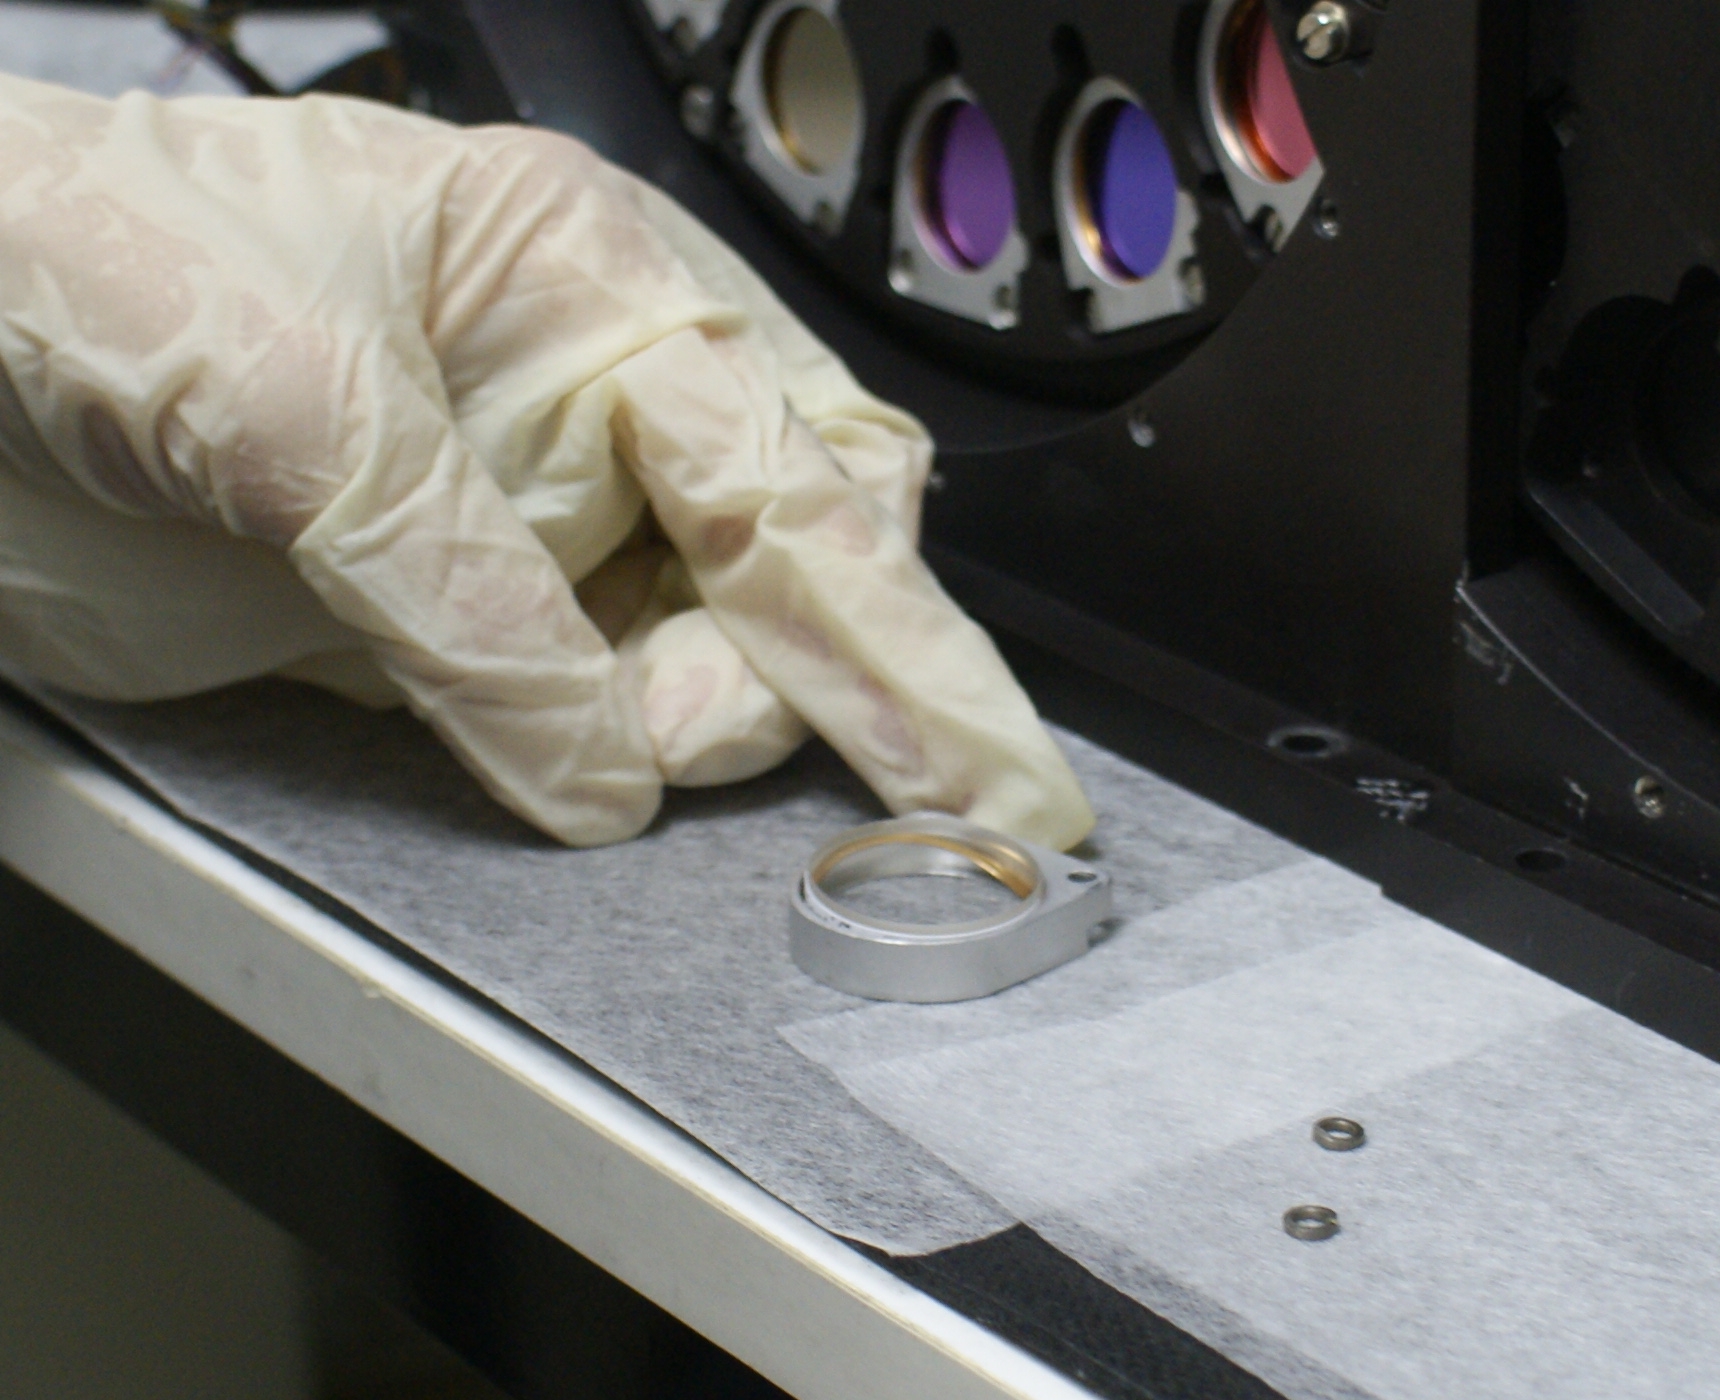
- Filters must be mounted inside the holders with springs in order to
keep them fixed but flexible enough to withstand cooling to -200 degrees
with the different thermal expansion coefficients of metal and glass.
Below is the BK7 glass filter (5.4mm thick) in its holder (type 3) on top
of the copper ring spring. If you are working with the filter unit in a
vertical position, you may wish to place the filter in its holder first,
as shown on the image, and then carefully mount this whole assembly
vertically into its slot (the open slot should then be on the lower part
of the wheel close to the table). An alternative way is to have the filter
unit horisontally on the table, slide the filter into its slot first
(with the help of lens tissue), carefully fit the cupper ring on top, and
with these two parts as centrally positioned as possible, then carefully
place the holder on top. One difficulty is that the copper ring sometimes
slides and part of it gets stuck on the outside of the filter.
- It is important to fix all 3 screws per filter holder (in order to
avoid light leakage). Make sure you note down or remember which filter
goes in which slot.
Necessary update of files
-
Carefully update the information in the filter slots using the script
editsetup, which is in use for NOTCam since October 2012.
- The two wheel definition files "filter1new.def" and "filter2new.def"
on the instrument computer (marissa) in directory
/home/software/setupfiles/NOTcam/
must be updated accordingly, as these are used by the instrument setup
scripts
notcam.setup-ima and
notcam.setup-spec.
| |