Wavefront Measuring using ALFOSC
These are some generalised instructions for taking wavefront sensor
(WFS) measurements using ALFOSC. The usual purpose for doing these
measurements is to determine the aberrations of the telescope. To get
reliable data the seeing has to be better than 1.1 arcsecs. The exact
procedure will depend on the specific information required, here is a
basic described on how to acquire WFS data of the telescope.
August 2023: use the low-resolution mask "WFSMaskLow"
and obtain data only in good seeing, fwhm < 0.8".
Setup
- The WFS-lamp (board with LED, switch and battery) and
WFS-mask with singlet lens are found in the storage
boxes on the wall, next to the white metal cupboard, labeled
Korhanen-Hartmann.
- Put WFS-lamp in aperture wheel. Set the stepper motor
position to modulus 40000 (i.e. for position N
is (N-1) x 40000)
- Put WFS-mask with singlet lens in the grism wheel and set
the wheel position to mod. 40000.
- Put H-Alpha narrow #21 filter (also called `Halp 656_3') in
FASU.
- Update the slit.def, grism.def and fasu?.def
files using the
GUI
editor.
- The following day dismount both the WFS lamp and mask from
ALFOSC if it is no longer needed.
Calibration
This should be done during the day before the night's observing.
-
Switch on the calibration lamp, a little switch on same board as the lamp
in the aperture wheel (switch position 'I'). Remember before you go up
to turn the aperture wheel so you can reach the WFS-lamp.
- Put the calibration lamp in the beam together with the B#74
(B_Bes 440_10) filter to find the position of the calibration lamp image
on the CCD as follows:
- Window the CCD to 400x400 pixels with the set of commands:
> xsize 450 ; xbeg 850 ; ysize 450 ; ybeg 850
- Take a 10 second exposure exp 10. In the Sequencer term use
the imexam a command to get the x, y position of the calibration
lamp image.
- Edit the slitpos.def file using the alfosc.edit-slitpos
command to add the coordinates but remember to account for the xbeg and
ybeg offsets!
For xbeg=ybeg=850 add 849 to the x and y position
returned by imexam,
(i.e. for x=302, y=333 returned, then enter x=1151 and y=1182 in the slitpos.def file).
- Next put the WFS-mask from the grism wheel in the beam and use
the R#76 (R_Bes 650_13) filter and take say 3 calibration (spot)
frames
(e.g.mexp 50 3). Ensure that the spot image
is well within the 400x400 pixel window with clear space all around it and
that the spots are not saturated or under exposed.
-
Switch off the calibration lamp (switch position '0'), you should not
need it again. Remember before you go up to ALFOSC to turn the aperture wheel
so you can reach the WFS-lamp.
The reason for determining the position of the cal. lamp image on the
CCD is to ensure the path of the light through ALFOSC is the same for it
and the star. It is necessary to get the position of the image with the
CCD windowed because you get different values with a full frame, and you
operate with a windowed CCD.
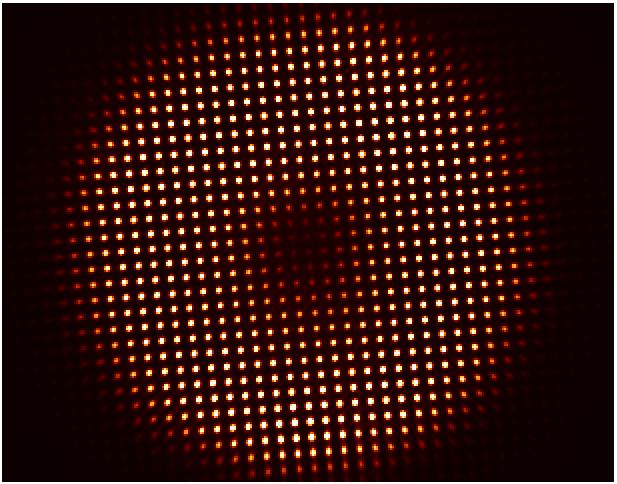
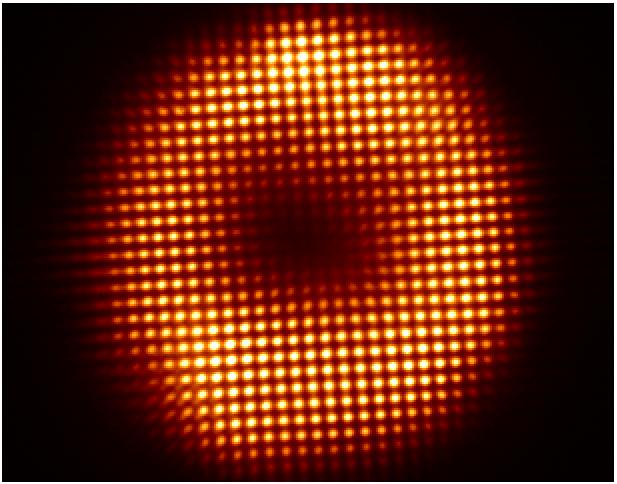
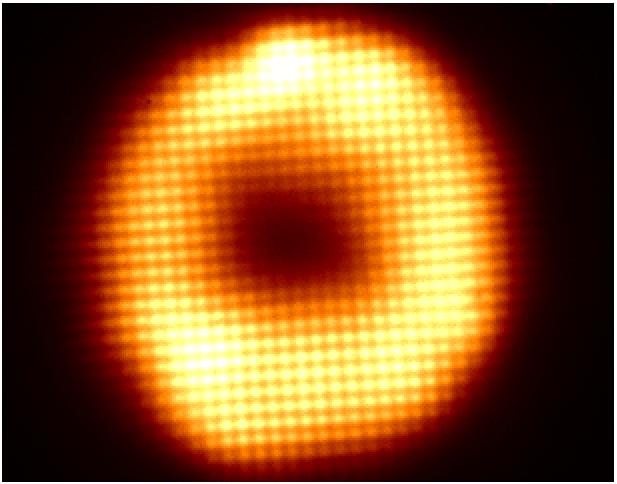
Below are typical examples of images you can get. The poor image is due to bad
seeing conditions. Note here the area shown is only 300x300 pixels.
|
|
|
Calibration Image
|
Good Stellar Image
|
Poor Stellar Image
|
Details of Measurement Procedure at night
- The seeing must be good, fwhm < 1.1 arcsecs, to get useful data.
- Load catalogue /catalogue/wfs4raf.cat. This catalogue has
all the stars from Mv = 4 to 5 for latitude 29 ±4 degrees, plus
some focus stars from the Blanks catalogue.
-
Locate a star between zenith angles 10 - 30 degrees and to minimise
rotator movement as near to 28 45' (telescope declination) as possible.
-
Use TCS CATALOGUE function 6 Preset w par ang to point the
telescope. This is because we wish the rotator to always be close to
rot-pos 0, this can be achieved using the `Following the parallactic angle' TCS feature. The correct
setting of the Instrument Parallactic Angle is done with the script
tcs.setup-tel-alfosc, otherwise type on the TCS i-p-a 0.
-
Select the R-filter and set its focus with the sequencer commands:
wheels -f 76; focus-offset.
To correctly position the star on the CCD put in the H-alpha narrow
filter (in FASU) together with R filter (use the UIF buttons).
- Window the CCD using
> xsize 450 ; xbeg 850 ; ysize 450 ; ybeg 850
and take a short exposure exp 1. Use the
Sequencer script alfosc.slitoff [slit=<nn>], where
the input parameter is the slot position of the requested slit (or in
this case the wfs lamp) in the aperture wheel.
The alfosc.slitoff command puts the object under the cursor at
the position entered in the slitpos.def file, i.e. the
calibration lamp position found in the afteroon. For the WFS this
ensures the star light
through ALFOSC goes along the same path as the calibration light.
- Now remove the H-alpha narrow filter, but keep the R-filter, and put
the WFS mask (grism wheel) into the beam (use the UIF buttons).
- Make a test exposure (e.g.exp 30) to determine the correct
integration time, then start a mexp tt nn. Five integrations
should be satisfactory. An exposure time between 30s and 50s is usually
sufficient for magnitude Mv = 4 to 5 stars respectively.
You may need to set the scale to min/max on the DS9 to see properly the
resulting image and check that none of the spots are saturated.
|