Mounting filters when using ALFOSC
- Filters are mounted either in ALFOSC or FASU (Filter And Shutter Unit). Narrow band filters should always be mounted in FASU.
- Start the ALFOSC UIF
- Move the filter wheel to the position opposite to the one you want to exchange.
- Take the filter from the carousel, use optical paper when handling the filters.
- Check the filter's general appearance for scratches, dust, etc. Ask Tapio pursimo to update the filter status table if necessary.
- If needed check staff instructions for cleaning filter.
- Take the ALFOSC filter frame from the filter carousel and put the filter into it.
- Go to the dome floor and open the access box.
- Loosen the 3 screws in the holder.
- Carefully remove the filter and wrap it with optical paper.
- In ALFOSC the filters should be mounted the reflecting side towards sky.
- Tighten the 3 screws in the holder.
- Put the removed filter back to it's correct drawer in the filter carousel.
- Update the ALFOSC filter wheel setup using the
GUI editor in the following
way:
- Log in to 'selena' as user 'obs'.
- Run the command 'editsetup'.
- Make the changes needed.
- Press 'Read Setup' on the UIF.
Mounting filters in FASU
- FASU has two filter wheels A and B, latter being the uppermost.
- Take the filter from the carousel, use optical paper when handling the filter.
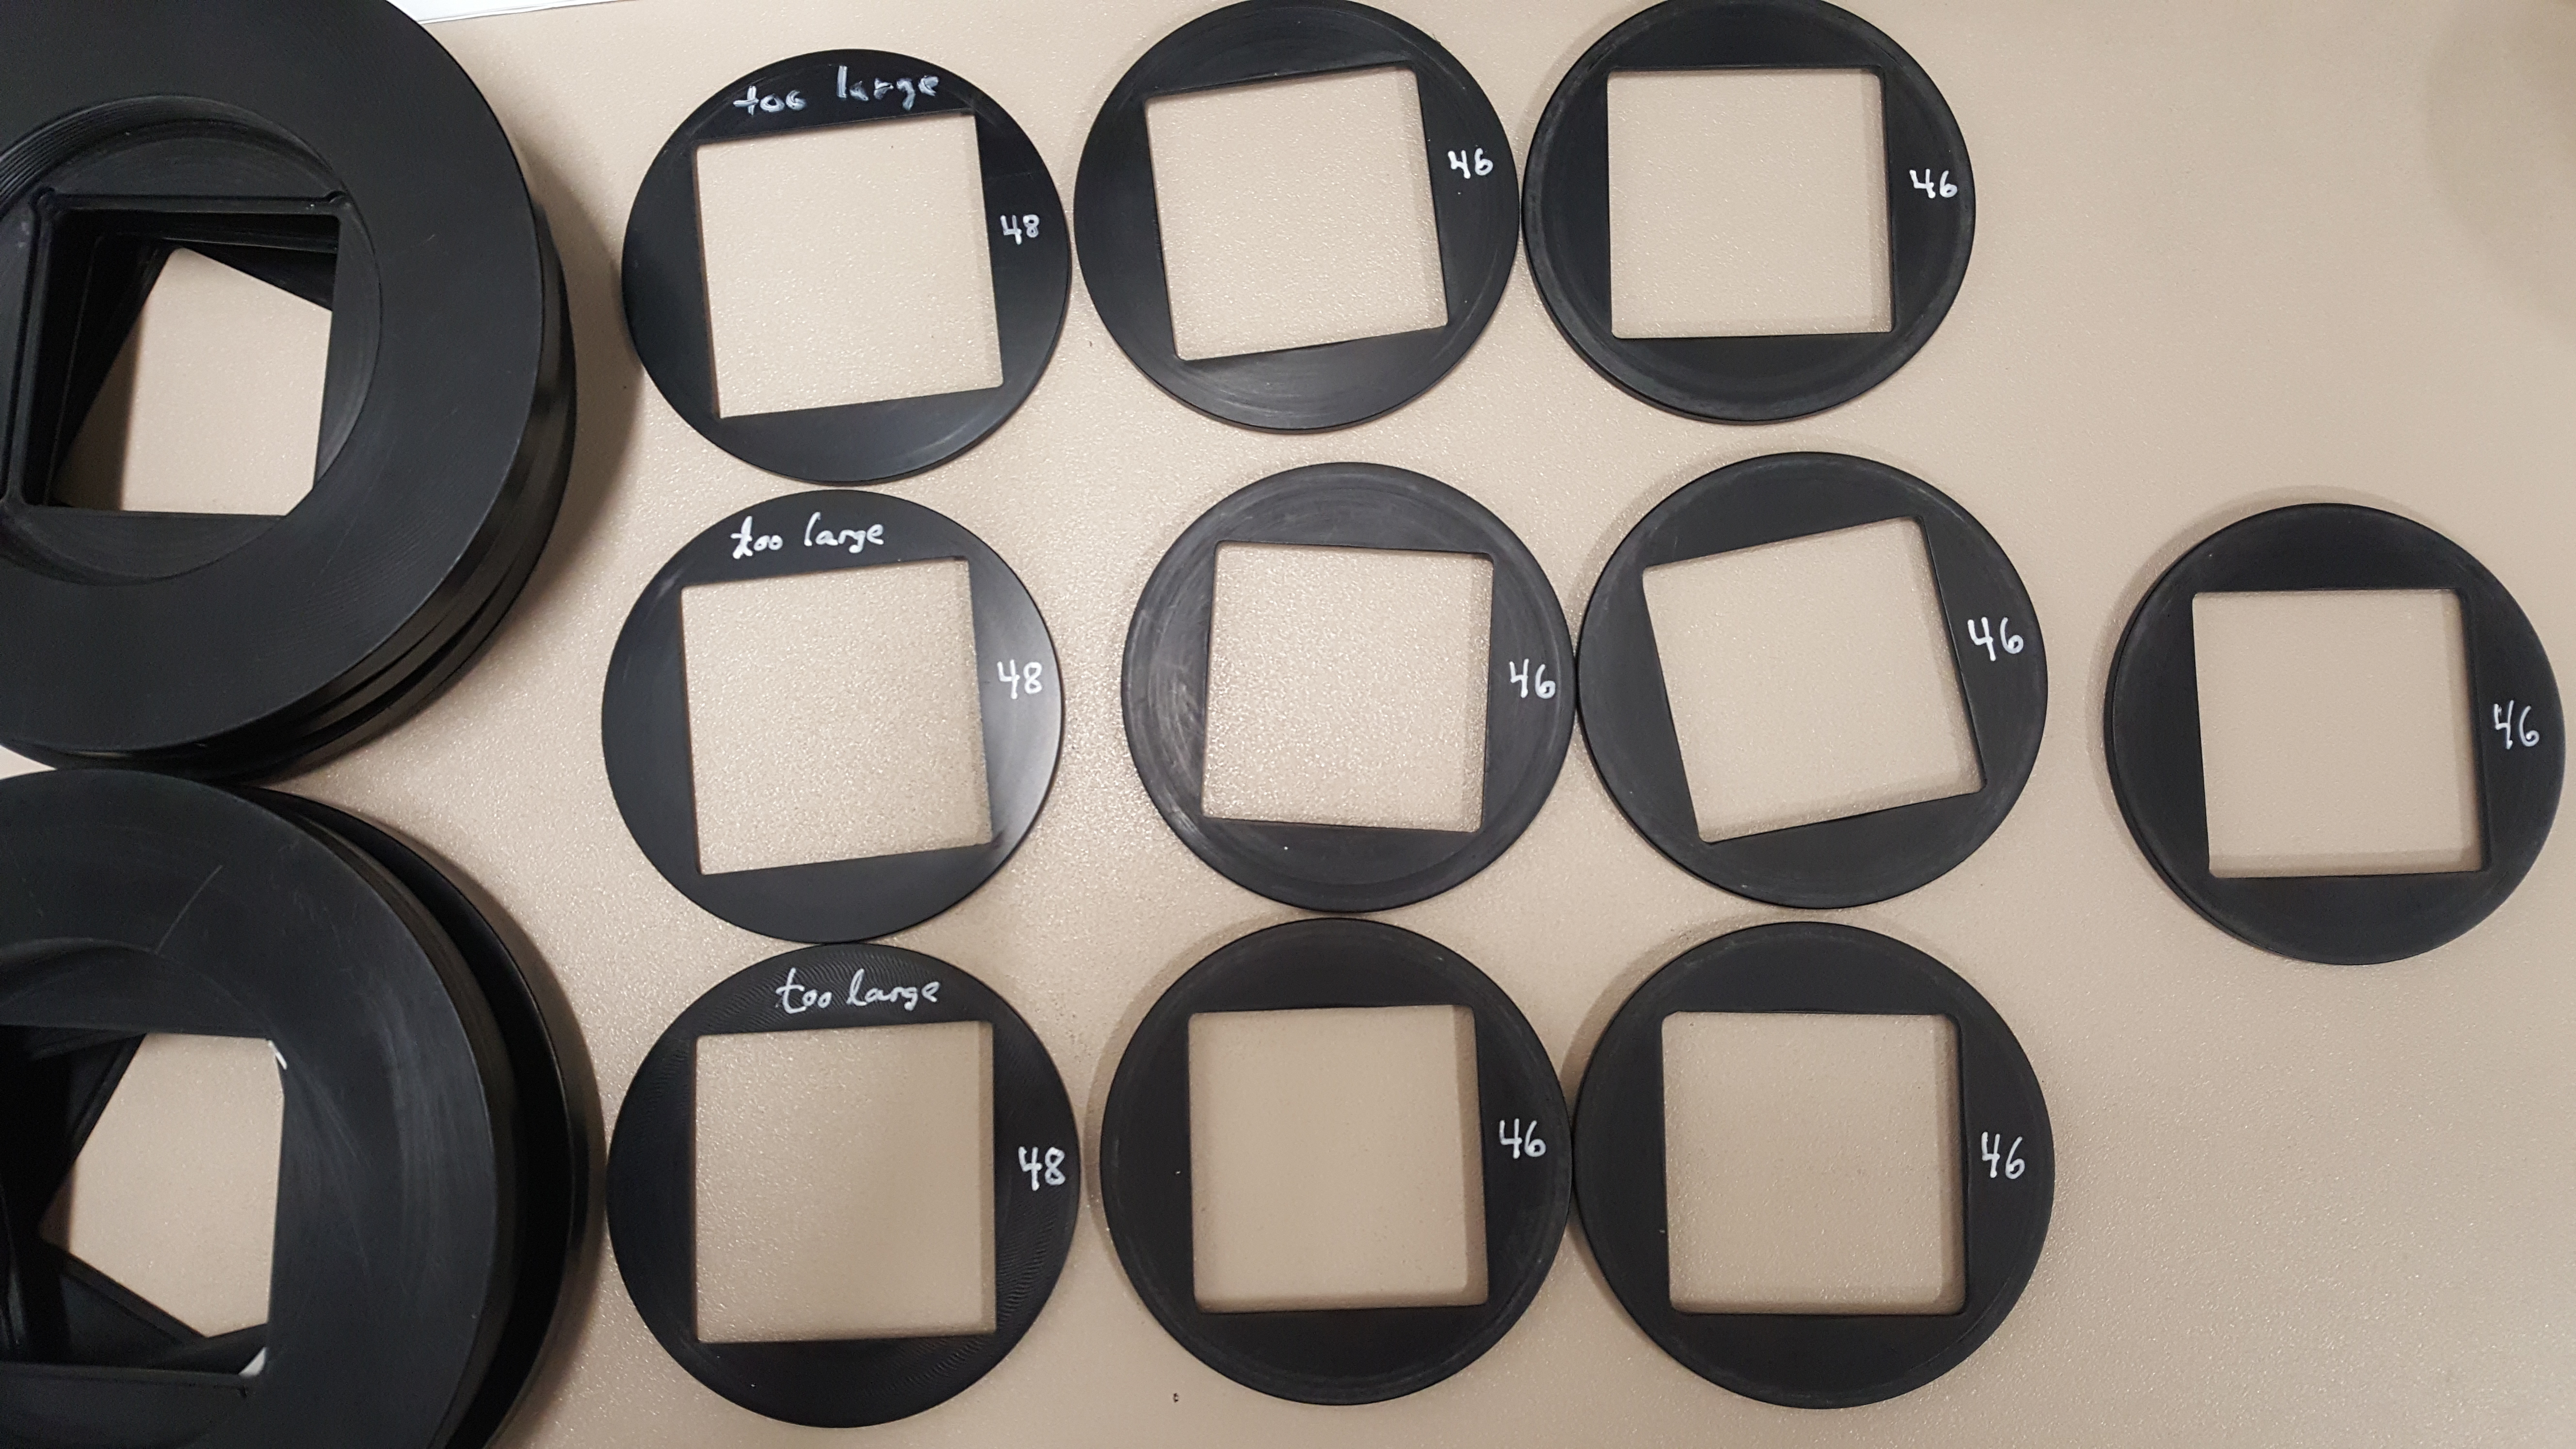
- For 51 mm square filters there are special protection rings/plates that should be used.
Note that the protection plates with 46mm square opening are the ones to use. There
are a few with 48mm opening, but these should be avoided. See 51 mm protection rings.
- For relatively thick filters (about 8 mm or more) the metal ring holding down the
filter can stick out above the filter holder. Such filter should
only be installed in filter wheel B. (If you
put them in the FASU A, the wheel can get stuck and/or the filter
can fall out of the wheel!!!)
- For thin 60mm round filters use plastic rings between the filter and the ring, if the
metal ring does not hold down the filter firmly on the holder.
- There are a set of plastic rings to be used together with the 95mm round filterholders
for FASU in order to mount ING TAURUS filters, which are 76mm round and about 14 mm thick.
At most 4 such filters can be mounted at the same time. The set of rings is found in the
drawer "FASU rings". Mount such that the filter protrudes in the upward direction when
viewing the filterholder the way it is mounted in FASU, and mount them only in FASU B.
- Check the filter's general appearance for scratches, dust, etc. Ask Tapio Pursimo to
update the
filter status table if necessary.
- If needed check staff
instructions for cleaning filters.
- Filter frames for FASU filters can be found from rectangular box. Take the propers
sized frame and label it with the filter name you put in there.
- Put the filter into the filter frame using the FASU filter tools found on the
desk next to filter carousel.
- Go to the dome floor. To reach each of the wheels one needs to unscrew four
bolts on side of FASU holding the metal plate. With UP and DOWN buttons that are
next to the plate one can change the filter position. In order to move the wheel
with half a step one needs the change the switch from 'local' to 'remote' on top of
FASU handset.
- When the filter to be removed is in available raise the lever on the left and
pull it towards you. Now you can take the filter with the frame away from the wheel.
- Carefully remove the filter and wrap it with optical paper.
- In FASU the filters should be the reflecting side towards sky.
- The square holders should be oriented according to the mark on the rim of the holder and the centre of the slot
i.e. rotated by 15 degrees in the wheel.
- Put the metal plate back. Tighten the screws.
- Put the switch back to 'local' and open the shutter.
- Put the removed filter back to it's correct drawer in the filter carousel.
Updating definition files when using ALFOSC
- Update the FASUA and/or FASUB setup definition file using the
GUI editor in the
following way:
- Log in to 'selena' as user 'obs'.
- Run the command 'editsetup'.
- Make the changes to the FASU wheels that are needed.
- Reread the setup
- Make sure that the UIF is displaying the correct position of the FASU wheels by
selecting a filter (or open position) from FASU A and FASU B. The reason is that the software does not register
the changes in the wheel position from the UP and DOWN buttons.
Updating definition files when using MOSCA
- Log in to marissa as user 'obs', if needed.
- shutdownobsys mosca, if needed
- Update the correct filter names using
the GUI editor
(Run the command 'editsetup').
- If you leave the filter wheel in "half"-position, fasucontrol
does not start.
Error message like: "FASU wheel A is detected to be on
a half position..."
Please follow the instructions in the message.
- Restart observing system and make sure the set up is as wanted
Mounting filters when using NOTCAM
- NOTCam is an infrared instrument and the whole instrument is
inside a huge croystat cooled to about -200 degrees C. For
this reason changes in the setup, like installation of filters,
is made only while the instrument is warm and open in the clean
room of the Service Building, hopefully about once per year in
the future.
-
Instructions for installation of NOTCam filters..
Mounting filters when using StanCam
If you haven't seen the filter cassette before have a look at the
top shelf of the wooden cupboard in the control room. You should see
the "StanCam filter mechanism align tool", which is similar to the
cassette in use.
Before starting, MANDATORY!
- On the TCS UI terminal do 'CCD-Filter 0', otherwise the casette
might be far in and a filter at the CCD position.
Before changing filters:
- The filters BVR, g', and clear#126 are to be used for FIES target
acquisition.
So it would be nice if we could not swap them ever. And if they are
swapped it would be nice if they go back to positions 2,3,4,6,8
respectively. This because documentation and scripts expect these
filters to be at those positions.
At the Electronics room:
- Choose an appropriate filter holder from the wooden briefcase
(labelled "StanCam filter holders 60mm/51mm sq").
- label the holder
- carefully mount the filter in the holder.
- blow dust away from the filter
At the observing floor:
- open the cassette door (right from the dewar), unscrew the bolt
and carefully pull the cassette out. Be careful, because the left
hand side of the cassette is open and there is no mechanism to keep the
filter holders in the cassette.
- Put the cassette on the floor
- Change the filters in the cassette. Check the orientation of the
holder and check that the reflecting side is towards sky.
- Push the cassette back in it's place, tighten the screw and close the
cassette door
At the control room:
- Startup any observing system and from a sequencer window, type stancam.change-filter.
Use this interactive program to update the information on the cassette positions for which a filter has been changed.
DO NOT UPDATE FILTER INFORMATION FROM THE TCS CONSOLE!!
Running this sequencer script will make
sure the filter information is updated everywhere it is required, including the TCS.
|
