Table of Contents
Basic Instructions
Preparing observations
- Plan observations (see Run preparation).
- Prepare observations blocks, pointing scripts and/or TCS target catalogue.
Afternoon preparations
- Turn off the control room webcam
- Turn on the screens and brightness from TCS
- Erase old catalogue, if needed
[TCS] erase-catalogue
- Upload new catalogue, if necessary (not needed if using OB's)
- Start observing systems which you will use
- Take necessary calibration images
- Make a schedule for the night to the Visplot.
Weather precautions
| Humidity |
Wind |
Dusty Wind |
Temperature |
> 90% - Close telescope
After 20min < 90% the telescope can be reopened. |
12 m/s - Close sideports and lower hatch |
10 m/s - Close sideports and lower hatch |
If the humidity is > 90% and the temperature is
< 0° C close telescope and do not open until all ice has melted on the outside of the dome. |
| 15 m/s - Observe down wind: at least 85 degrees in AZ away from wind |
12 m/s - Close telescope |
| 20 m/s - Close telescope |
Start of the night
- Reset the safety system
- [TCS] power-on, after dinner
- If opening before sunset, turn away from sun
[TCS] goto Blankxx+xx or [TCS] building-hoist-position
- [TCS] open-upper-hatch, around hour before sunset, if weather allows
- [TCS] open-lower-hatch, around hour before sunset, weather allows
- [TCS] open-side-ports-fully, if before sunset, leave ports towards sun closed
- [TCS] open-mirror-covers, at sunset when starting flats or for narrow filters 1-2 degree before
Sky flats
- If not already done, start with
[obs@selena][ALFOSC]$ setup-tel-alfosc
- Point to blank field away from sun
[TCS] goto BlankXX-XX
- Choose correct filter and adjust focus (start from narrowest and bluest. For morning flats use opposite order)
[obs@selena][ALFOSC]$ wheels -f [filter-ID]; focus-offset
- Start the script for flats
[obs@selena][ALFOSC]$ easyflat 3
- When the third image is reading out change to the next filter (astrowakeup reminds you when is time).
[obs@selena][ALFOSC]$ wheels -f [filter-ID]; focus-offset
- Repeat steps 4. and 5. until all flats are done.
Autoguiding
- After obtaining skyflats, switch on the two Guide TV monitors above the TCS monitor and type tv-on on the TCS to turn on TV guide camera.
- When observing the TCS should automatically find the optimal guide star and you only need to check these:
-The guide star is visible in the star box (link here how to troubleshoot autoguiding)
-Signal strength is between 1-24
-Guide star is on focus
Telescope Focus
In normal and good seeing focus the telescope using script
[obs@selena][ALFOSC]$ focus
If seeing is very bad, use the default focus and focus the telescope when seeing has improved. During the night consider focusing again if
- Focus value is far away from default value
- FWHM values in images are worse than what could be expected from DIMM seeing
- Temperature or other conditions have changed a lot since last focusing
- Seeing is good and observations require good FWHM
Observing using OB
- Compile script from the Visplot or from the visitor OB queue or the staff OB queue
- To run the script, locate it in your folder,
[obs@selena][ALFOSC]$ cd ~obs/scripts/proposal-ID
[obs@selena][ALFOSC]$ ls -lrt
- Copy and paste the "scriptname" on the command line: and run it e.g.
[obs@selena][ALFOSC]$ "scriptname"
- Follow the instructions in the sequencer carefully. The first interaction needed is to confirm the guiding. Depending on observations you might need to mark your target from acquisition images or do other steps.
Imaging manually
- Add your target to the TCS target catalogue and preset the telescope
[TCS] append-object my_star 12 12 12 +23 23 23 2000 0.1 -0.1 12
[TCS] ag-off
[TCS] guide-object my_star
- Setup the ALFOSC wheels and adjust telescope focus for filter
[obs@selena][ALFOSC]$ wheels -f xx
[obs@selena][ALFOSC]$ focus-offset
- Set the object name
[obs@selena][ALFOSC]$ object my_star
- Start a single exposure e.g.
[obs@selena][ALFOSC]$ exp 300
Or some other imaging mode like for example dithering
[obs@selena][ALFOSC]$ dither 5D 12 200
Spectroscopy manually
- Add your target to the TCS target catalogue
[TCS] append-object my_star 12 12 12 +23 23 23 2000 0.1 -0.1 12
- Start guiding with parallatic angle
[TCS] guide-object-with-parallatic my_star
- Do Target-to-slit acquisition with the slit you will use and the exptime in seconds
[obs@selena][ALFOSC]$ acquisition -c -q Slit_1.0 exptime
- Choose the desired CCD setup (windowing, binning), e.g.
[obs@selena][ALFOSC]$ resetxy
[obs@selena][ALFOSC]$ xsize 400
[obs@selena][ALFOSC]$ xbeg 851
- Put in the grism e.g. grism #4
[obs@selena][ALFOSC]$ wheels -s Slit_1.0 -g "#4"
- Make optional lamp calibrations at this point
[obs@selena][ALFOSC]$ calibexp -o "HeNe at my_star" HeNe [exptime]
- Name your object
[obs@selena][ALFOSC]$ object "My Star"
- Star exposure
[obs@selena][ALFOSC]$ exp 1200
- Once the exposure is finished check the spectrum (link to analyse on the fly)
Polarimetry manually
- Add your target to TCS-catalogue and preset the telescope
[TCS] append-object my_star 12 12 12 +23 23 23 2000 0.1 -0.1 12
[TCS] goto-object my_star
- Setup the ALFOSC wheels, adjust the instrument focus and take a tes image to identify the field
[obs@selena][ALFOSC]$ wheels -f xx
[obs@selena][ALFOSC]$ focus-offset
[obs@selena][ALFOSC]$ exp xx
Offset the telescope if needed. e.g.
[obs@selena][ALFOSC]$ teloffset xx xx
- Setup the ALFOSC wheels for imaging polarimetry, move the retarder plate in the beam, adjust the telescope focus, window the CCD and take a test image to estimate the integration time.
[obs@selena][ALFOSC]$ wheels -f xx -s Calcite
[obs@selena][ALFOSC]$ carriage in
[obs@selena][ALFOSC]$ focus-offset
[obs@selena][ALFOSC]$ polwin
[obs@selena][ALFOSC]$ exp xx
- Begin exposing, (number of angles, object name, exp time, number of cycles) e.g.
[obs@selena][ALFOSC]$ linpolexpose 4 my_target 90 1
Or for circular polarimetry, e.g.
[obs@selena][ALFOSC]$ cirpolexpose 2 my_target 30 100
End of the night
- [TCS] tv-off
- [TCS] close-mirror-covers
- [TCS] zenith
- [TCS] building-park-position
- [TCS] close-lower-hatch
- [TCS] close-upper-hatch
- [TCS] close-side-ports
- When telescope "Idle" [TCS] power-off
- Have a look in the dome
- for ALFOSC nights [obs@selena][ALFOSC]$ alfosc-calibs Alxxxx
for NOTCam nights [obs@selena][NOTCAM]$ notcam-calibs NCxxxx
where xxxx refer to the file prefix for the night.
- Turn down TCS screen brightness
- Turn off monitors (NO TCS)
- Turn on the control room webcam
- Complete the www report forms
- Turn off lights
- Lockup the dome
- Clean up the kitchen/loung area
- Lockup the service building
Detailed instructions
Preparing Observations
You can do observations using script generated from OBs, custom script and/or manually using command line. With TCS target catalogue you can have all your targets loaded in TCS for manual observations, but if you are using script the catalogue is not needed as the script will automatically add target to TCS.
Observing scripts
Observing scripts can be generated automatically through the
Observing Script Generator
or crafted manually. If done through the web, the script will be uploaded and within a few minutes available in
~obs/scripts/proposal-ID, where proposal-ID refers to the proposal ID entered in the web
form (e.g. 38-042). If the directory does no exist, it will be created. If you make your observing scripts manually,
first make the proposal ID directory (using mkdir) and place them therein.
The scripts are executed from the sequencer window, from the directory where they are placed.
Note that if you are saving scripts or files elsewhere in the ~obs account, the directory
will be cleaned up after every run and it will not be possible to recover them.
Create a TCS Target Catalogue
A source catalogue can be made well in advance of your observations by using the web interface,
NOT Source Catalogue Creation.
Note that it is also possible to enter targets on-the-fly and create a catalogue directly on the
TCS while observing (See section, Loading Target Catalogue).
Exposure Time Calculator
The Exposure Time Calculator
can be used to estimate the required exposure times for ALFOSC, NOTCam, FIES, MOSCA and StanCam (both in
imaging and spectroscopy mode, where it is available).
Afternoon preparations
Overview
TCS access code
Any instrument computer which needs access to the TCS, for instance
to move the telescope during slit acquisition or dithering, will ask
for the current TCS access code at start-up. This
code is updated every day (around lunch time). When you are asked to
supply the TCS access code, do the following:
- On the TCS VT510 terminal, make sure that the brightness
is turned up
- On TCS type: Show-Page and then 1 (or type
sh-p 1 for short)
- The TCS access code is shown on the top part of the screen
as: AccessCode xxxxxxxxxx
Loading the TCS Target Catalogue
Starting the ALFOSC observing system
- Switch on the lisa screen (the switch is behind the screen
to the lower right).
- On the XDMCP chooser click on the line
'selena.not.iac.es Willing to manage'
- Log in with username 'obs'. Password is the standard
one.
- Move the cursor to the left border of the screen and select the NOT
logo icon (see the image below), click on it and login to Selena as user "obs" (passwd
on the whiteboard). An Xephyr window appears with a blue background.
- Open a terminal window and type
[obs@selena ~]$ startobssys alfosc
A window will pop-up, asking for the TCS access code. Type it and
press enter. If you type the wrong code a red error message appears and
you must try again.
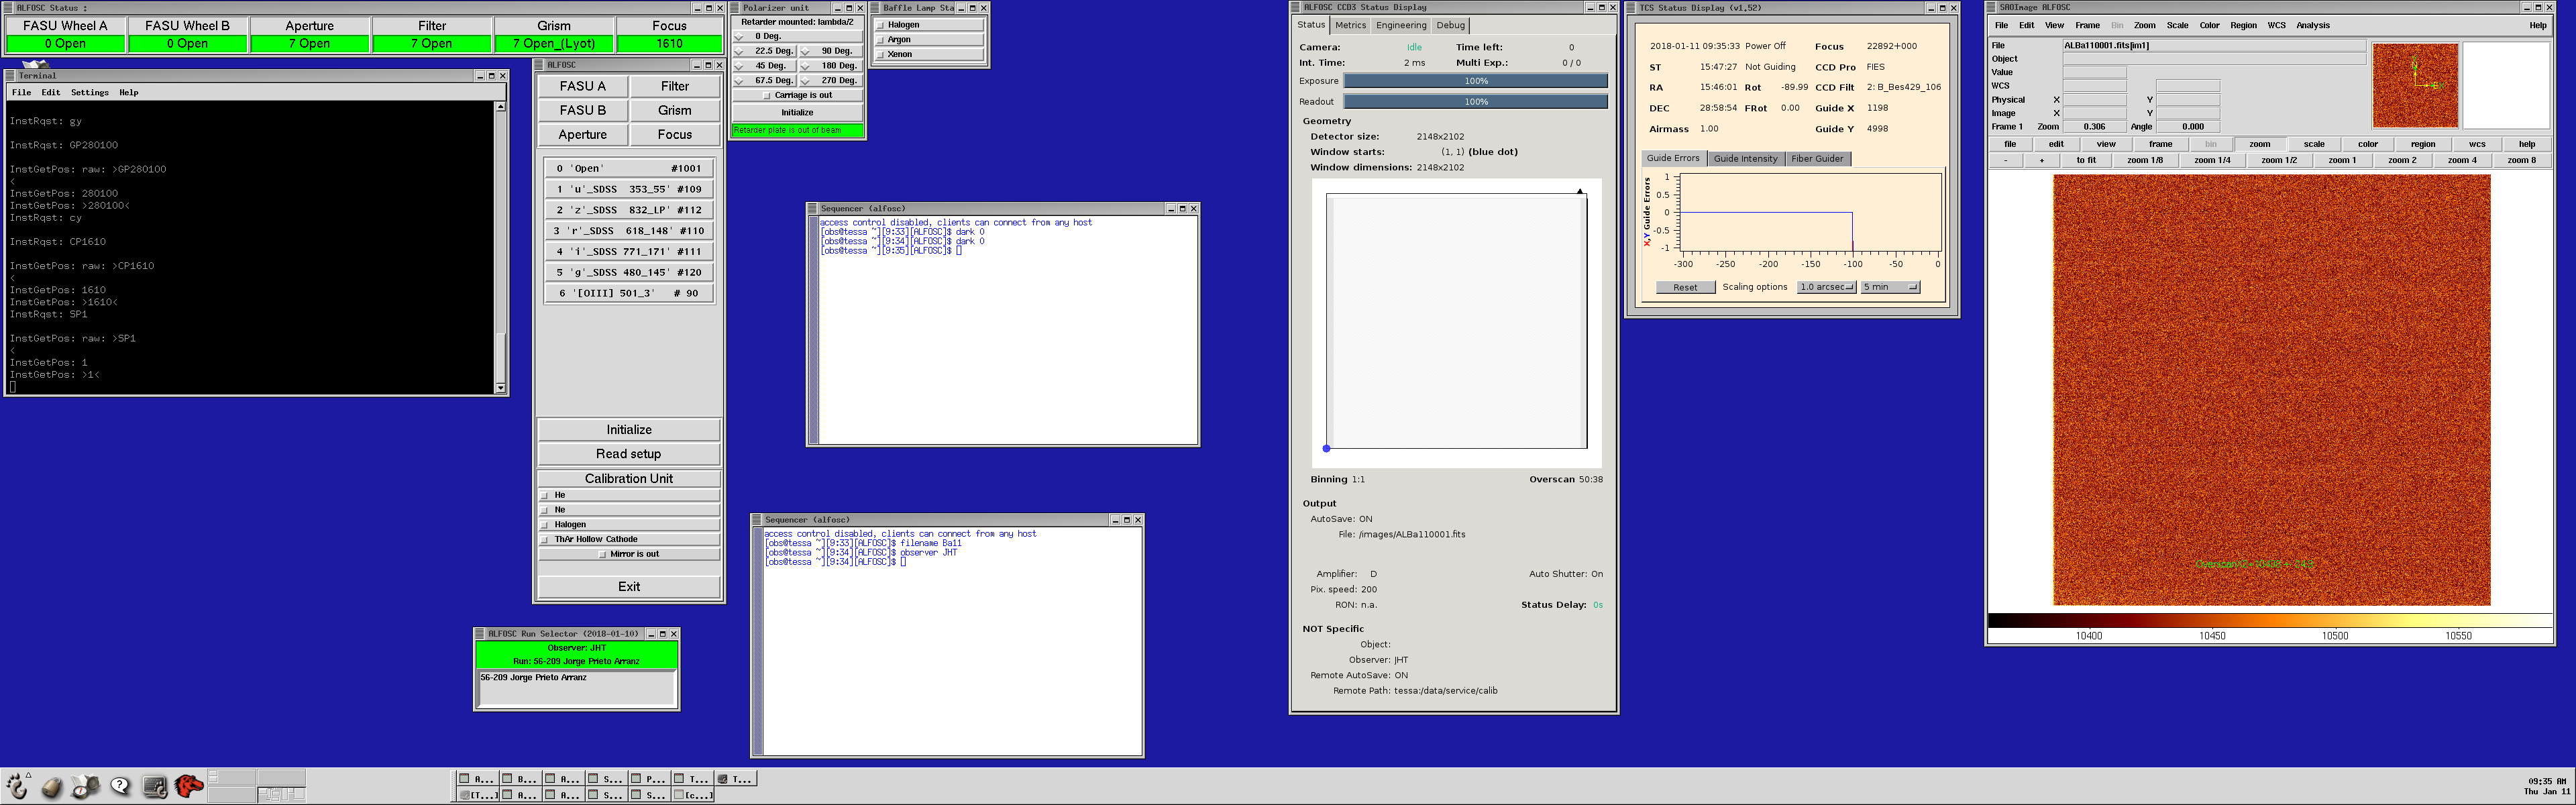
All the ALFOSC software will now be started - the UIF, CCD3COMM and
the FAPOL control. You will notice two terminals in blue/white
colours with the title "ALFOSC Seq".
These blue/white Sequencer windows (also called "seqterm"; use
this command to get another sequencer terminal) are used to
type-in the sequencer commands.
The data will be saved in /data/alfosc and will have
the format ALph160001.fits, where 'AL' is
the image prefix for ALFOSC images, 'p' is for 2006,
'h' is for August, '16' is for the date 16
in the month and '0001' is a running number.
-
The automatic ALFOSC observing log displays a listing of FITS headers for
incoming data files. The System Talker lists incoming messages from the
Sequencer. These two programs are displayed on the InfoSys monitor, and
are automatically reset every afternoon. If you change between instruments
you can change the obslog with the command e.g.:
[obs@selena][ALFOSC]$ alfosc.showlog
- The software interfaces for the instruments are very similar
looking. Many commands are common for all instruments and are executed
from the sequencer window. For instance, type object
name to specify a name that will be the object keyword in
the fits header. To make an exposure, type expose t
where t is the time in seconds. See the list of the most commonly used sequencer
commands. For a complete list of all sequencer commands, view the
Sequencer
Reference Manual.
- In all the SEQUENCER windows change the working directory to the one
assigned to your program, for instance
[obs@selena][ALFOSC]$ cd ~/scripts/38-053
as in this directory your ALFOSC observing
scripts can be found, created, and executed.
- In an ALFOSC SEQUENCER window set the OBSERVER FITS header
to hold the name of the actual observer(s):
[obs@selena][ALFOSC]$ observer "Your Name"
This will remove the RED
"no-observer-specified" alert in the small "ALFOSC Run Selector"
window, and will show the new value of the OBSERVER FITS header
nicely in GREEN instead.
- In the Talker you will find information about the correct start of
the different software components or a corresponding error. If any
errors about a program not starting are seen, please shut down the
observing system and start it again.
- Use and enjoy the Sequencer.
Click (twice) on the ScreenShot below to zoom in. On the right there is screenshot on the NOT logo icon where Xephyr window opens.

Obtaining calibration frames
For ALFOSC it is recommended to obtain at least one set of bias frames
(nine or more) in the afternoon.
The expected bias level is about
10 kADU/pixel , in case of e.g. 16kADU/pixel
give a command "resetxy" or "xbin 1" (
see more known ALFOSC CCD3 problems and solutions ).
In addition, some spectroscopic
calibrations are best to obtain in the afternoon, such as windowed
bias frames and (windowed) spectroscopic flats for blue grisms (bluer
than Hα).
Imaging
Even though twilight flats should do a good job, it does not make any
harm to take a set of dome flats as well for the broad band
filters.
For dome flats, place the "Dome FF Lamp" under the telescope, open the
mirror covers, check the camera probe position, choose the desired
filter and type e.g.
[obs@selena][ALFOSC]$
exp 15
The expected integration times are about 150,30,20,15,15
seconds for BVRI, SDSS z respectively, if the telescope is pointing
zenith. Note that the integration times are dependent on the
telescope altitude and the location of the lamp.
Spectroscopy
Determine the CCD window to be used for spectroscopy. For example for horizontal spectra
[obs@selena][ALFOSC]$
resetxy
[obs@selena][ALFOSC]$
ysize 400
[obs@selena][ALFOSC]$
ybeg 851
will set a rectangular window of 400 pixels wide (0.2138 arcsec/pixel).
The star/object will typically be centered at CCD pixel Y=1050 for
horizontal spectra, and at X=1050 for vertical spectra.
To obtain 9 bias frames use the commands
[obs@selena][ALFOSC]$
object bias
[obs@selena][ALFOSC]$
mdark 0 9
and to obtain a 3-second HeNe arc lamp and five 10-second spectral flats use, for example
[obs@selena][ALFOSC]$
wheels -g "#4" -s Slit_1.0
[obs@selena][ALFOSC]$
calibexp -o arc HeNe 3
[obs@selena][ALFOSC]$
calibexp -n 5 -o flat Halogen 10
A list of valid
slit-names can be found here. Typical exposure times for
wavelength calibration and flat field exposures can be found here.
Note that the ALFOSC lamps will switch off automatically after 1200 seconds.
When using the alfosc.calibexp script to obtain lamp spectra, the script makes sure to
switch on the lamp before every exposure, and to switch off the lamp at script exit.
Polarimetry
For polarimetry it is recommended to take bias frames
(with the same window as the science data) and especially for
the WeDoWo dome flats.
For WeDoWo take a dome flat fields (11 images for example)
with slit/polarimetric mask, filter and polarimeter inserted
with rot-pos 0 deg and
second set with rot-pos 90 deg. if you keep the full xsize
the benefit is having pre/overscan in the frame.
For example dome flats with two rot-pos angles,
reading full x and windowed y of the CCD, using filter #12.
Switch-on dome lamps
Open mirror covers
[obs@selena][ALFOSC]$ tcs-command "Rot-Pos 0"
[obs@selena][ALFOSC]$
resetxy
[obs@selena][ALFOSC]$
ysize 360
[obs@selena][ALFOSC]$
ybeg 820
[obs@selena][ALFOSC]$
wheels -g "'WeDoWo" -s Slit_10.0 -f 12
[obs@selena][ALFOSC]$
mexpose 10 11
[obs@selena][ALFOSC]$ tcs-command "Rot-Pos 90"
[obs@selena][ALFOSC]$
mexpose 10 11
Close mirror covers
FIES override
In case of FIES override take the requested
calibration frames
you can change the electronic obslog between FIES and ALFOSC by
[obs@selena][ALFOSC]$alfosc.showlog
[obs@selena][ALFOSC]$fies.showlog
Instructions for the Visplot
Targets can be plotted by writing them directly to the Visplot or if they have OB's they can be plotted from OB queue.
Plotting targets to the Visplot from OB queue
- Open the OB queue
visitor: NOT frontpage > Resources for Observers > Observing Tools > (NOT Reporting) OB Queue
staff: intranot > OB Queue
- Select correct observations
visitor: Submit your proposal number and select observing mode "Regular program observed in visitor mode"
staff: Select observing mode "Nordic Service" / "Technical Night"
- Mark boxes of those observing groups that you want to plot
- Select "Show Group Details" (bottom of the page)
- Select "Show Blocks"
- If you are not sure that correct instrument setup has been installed select "Check Against Instrument Setup"
- Select "VisPlot"
"OB update link" can be found by clicking the name of OB at the right side of the plot. There the script can be compiled for that OB.
Telescope Startup Procedure
Return to the dome at least 30 minutes before twilight and follow the instructions below.
Weather precautions
| Humidity |
Wind |
Dusty Wind |
Temperature |
> 90% - Close telescope
After 20min < 90% the telescope can be reopened. |
12 m/s - Close sideports and lower hatch |
10 m/s - Close sideports and lower hatch |
If the humidity is > 90% and the temperature is
< 0° C close telescope and do not open until all ice has melted on the outside of the dome. |
| 15 m/s - Observe down wind: at least 85 degrees in AZ away from wind |
12 m/s - Close telescope |
| 20 m/s - Close telescope |
Telescope Control System (TCS)
- Turn up the brightness of the TCS screen (on right-hand side, below the screen).
- Look at the top-left of the TCS screen. If the item ST isincrementing, then the TCS is running, if
not - then the TCS needs rebooting
(rebooting the TCS
should be done under guidance of a staff member). Type refresh if the screen looks strange.
Telescope power-on and Dome Opening
- Check the safety system in the computer room.
Reset the system by turning the left key (marked as "First") and then the right key (marked as "Second"),
one at a time (See TCS Manual Sect. 10.1
for procedure). If you hear a repeated clanking sound then the system has not reset, check the red lights
above the keys to see if a safety stop or other item is set.
- After dinner power on the TCS by typing, power-on and confirm with y for yes. Look at the status page number 1 (type sh-p 1).
On this page the status of the power units for the telescope motors can be viewed. When the TopUnitPower
is on and the telescope is Idle, the telescope is ready to use. The power-on procedure takes about
one minute in total.
- Dome can be opened about an hour before sunset if you first turn telescope to the hoist position tcs.Building-Hoist-Position or point to a blank field which is away from the sun tcs.goto Blankxx+xx. Upper hatch and lower hatch can be opened normally, but leave north sideport closed tcs.open-side-ports-fully west south east. After sunset open north sideport as well tcs.open-side-ports-fully.
- At sunset, if weather conditions are OK, open the upper hatch with the mirror covers closed.
Press the key, START/STOP on the TCS and then the key Open Upper Hatch (7). Confirm by typing y
for yes. It takes about 3.5 minutes to open the upper hatch.
- In the dome (While the upper hatch opens) check that nothing is in the way of the telescope motion (altitude: 6.5° - 90°)
- Open the side ports (only if
weather conditions are OK and the sun is under the horizon).
Type on TCS, open-side-ports-fully. Look at the TCS status page number 3 (type sh-p 3). Status page 31 shows more
details, but is delayed in updating.
For manual opening procedure of the sideports see
Sideport Operation .
The side ports can be operated individually and opened before sunset by typing in TCS
open-side-ports-fully south or respectively east, west, north based on the sun position.
- Open the lower hatch (only if weather conditions are OK).
On the TCS, press the keys Start/Stop
and Open Lower Hatch (8). Confirm with a y. It takes about two minutes to open the lower hatch. The TCS
will not allow opening of the lower hatch before the upper hatch has completed opening. In case you can only open the
upper hatch, the maximum zenith distance for unvignetted observing is 55°, and at a zenith distance of about
70° roughly half of the mirror is vignetted.
- The mirror covers can be opened at the sunset or 1-2 degrees before if flats for narrow filters are needed. On the TCS, press the keys
Start/Stop and Open Mirror Covers (9). Confirm with a y. It takes about 50 seconds to open the
mirror covers. Please note that the power for hatches and mirror covers is completely independent of the telescope
power and the electronics in the control room.
Set default telescope parameters
- This should be done in any sequencer terminal with
[obs@selena]$ setup-tel-alfosc
This sets amongst other items, the default telescope focus and rotator
angle, and auto-pos-full for fully automatic autoguiding when pointing
to an object. Note that after this command the telescope will stop tracking.
Sky Flats
If you are observing in imaging mode, obtain
sky flats in the evening twilight with the filters
you are going to use. Typical flat fields have count level about
2-300k ADU per pixel (bias level is about 10 kADU and linearity is
good up to 600k ADUs).
If you know before hand that you might be requested to perform
observations for a Target of Opportunity (ToO), it could be convenient
to obtain sky flats in the standard filters
(U, u', z', B, V, R, r', g', i, i') already in the evening.
Below is a short guide of how to obtain twilight flat fields for ALFOSC.
Now repeat the following points for each filter:
-
Choose your filter from the ALFOSC UIF or with the command
[obs@selena]$
wheels -f [filter-ID]
-
It is recommended to be close to the focus for each filter. The command
alfosc.focus-offset
checks the optical elements in the beam and adjusts the telescope
focus using measured values from the database. Use it in one line with the previous command, e.g.
[obs@selena]$
wheels -f 75; focus-offset
-
When the filter is in position, start the script
where 3 is the number of exposures. The script first takes a
windowed image to calculate the optimal exposure time. It then
starts the number of exposures, aiming for a count level in the
range 2-300k ADU per pixel. If the count level in the test image is
too high or to low, the script retries after 20 seconds. The script
makes a small telescope offset between each exposure, to avoid stars
being stuck on the same pixels.
Pro-tip: To make things go faster, you can start easyflat while the
focus offset is still being set (focus is less important for the
windowed test image). You can also start changing to the next filter
while the last frame is reading out (a bell will ring).
Manual sky flats
Flat fields can also be obtained manually. Make an exposure by typing
expose t in the sequencer window where t is the
exposure time in seconds.
It is recommended to make a small offset between each image in order
to be able to remove stars from the frames. To make an offset, choose
the move mode Telescope RA/DEC of the TCS by pressing 5
on the numerical key pad until the right move mode is selected. Then
make sure that the offset size is put to a suitable value by typing
offset-size x y on the TCS, where the value of x
and y is in arcseconds (it is recommended to use an offset size
of ten times the size of the FWHM of the seeing disk in order to
easily filter out the stars).
Make the actual offset while the CCD is reading out by pressing
AltFunc together with any of the arrow keys (make the
offsets in the same direction).
One keystroke corresponds to the value of the offset size.
AutoGuiding
It is recommended to have the telescope autoguide on an optical source
close to your target object. The TCS is automatically selecting a star
from the HST guide star catalogue. The guide probe is then
automatically placed at the correct position to auto-guide on this
star.
- After obtaining sky flats, switch on the two Guide
TV monitors above the TCS monitor. When it is dark outside, type
tv-on on the TCS to power on the TV guide camera.
Alternatively, use in any Sequencer window
[obs@selena]$ tcs.tv-on
The TCS command tv-off switches the TV camera off.
- On the TCS, type auto-pos-full to choose the fully automatic guiding mode.
Note that this is the default guiding mode as set in
tcs.setup-tel-<inst>.
In this mode, a guide
star will be automatically found, centered on the screen and
autoguiding will be switched on (ag-on).
If the guiding
does not start automatically but you see a guide star on the TV
monitor, type auto-pos-retry.
- The TV filter can be adjusted to the intensity
of the guide star by typing tv-filt name on the TCS,
where the options for name is Open, Closed, Grey, Red,
Yellow or Blue. Choose an appropriate TV filter based on
the brightness of the guiding object and keep an eye on the guide
monitors during your observations so you can change TV filter after weather conditions and
brightness of the guide stars.
- The autoguider TV focus is also set by the script
tcs.setup-tel-<inst>. The TV focus is depending on
instrument and can be adjusted by typing tv-foc value on
the TCS, where the value for default focus is found in Table 1.
If you wish the TV-focus to follow the telescope focus type
au-t-f (Automatic-TV-Focus, default setting) on the TCS, else
to restrict to only manual TV-focus settings type ma-t-f
(Manual-TV-Focus).
In automatic mode, after every pointing of the telescope the TV-focus
will be set to a default value that takes the telescope-focus position
into account. If that value is not adequate, you can recalibrate the
TV-focus on the spot: after adjusting the tv-focus type
calibrate-tv-focus in the TCS interface.
Note, do not change the TV-focus while integrating or while placing
an object on a slit. For example, the position of a star on ALFOSC CCD
can move up to 1 second of arc by adjusting the TV focus by 25 units.
- If you want to choose a new guide star, type
get-guide-star 2 (or 3,4,5, etc.) to get a new guide star from the guide server
at the current pointing, followed by auto-pos-retry.
- On the TCS, the signal strength from
the autoguider is shown as a number. A guiding value between 1 and 23
is useful. Put in a filter if the signal is above 24, otherwise the TV
filter will be set to grey automatically.
If the signal is close to 1 the autoguiding is not reliable
(e.g. clouds and/or bad seeing).
Set tv-filt open and check for
clouds.
- Make sure that the smaller box, the sky box is
placed outside the star box. If needed, move the sky box by selecting
the function Sky Box with Change move mode (5) and move
the box with the keystroke combination, Alt Function + arrow
keys.
Always turn-off autoguiding (ag-off) before moving
the telescope.
Hints for manual guiding and tweaking of telescope pointing
If guiding mode is set to auto-pos-off, the guiding has to be activated
manually. Furthermore, in case that the pointing is not optimal, some
manual tweaking may be required.
For manual choosing of a guide star, start with preseting to
target. Find a guide star on the screen and move the star box to the star
by pressing the key change move mode (5) on the TCS several times until
the option Star Box is shown. Move the box by using the keystroke
combination Alt Funtion + arrow keys. Alternatively, choose the move mode
Guide Probe to move the star into the box, or use the command move-g.
To set the step size of the Guide Probe, type probe-step-size x y on the
TCS, where x and y are in arcseconds.
In case the telescope pointing is not optimal, in particular if the guide star
ends up outside the screen, a pointing correction can be made with the move
mode called Telescope: press the key change move mode (5) on the TCS several
times until the option Telescope is shown, and move the star by using the
keystroke combination Alt Funtion + arrow keys. The step size of the
Telescope is set with the command offset-size on the TCS UIF.
Alternatively, if no guide star can be found on the screen, use get-guide-star
2 (or 3,4,5, etc.) to get a new guide star from the guide server at the
current pointing.
If still no guide-star is seen on the guide TV,
the Aladin@NOT
tool allows to identify suitable guide stars:
in "Guide probe" view, use the pointer
to read off (GP_X, GP_Y) coordinates of a suitable guide star inside the red-lined GP area,
and then use the TCS UIF to move the guide-probe to those coordinates with commands
x GP_X and y GP_Y.
When the star is placed in the starbox, type ag-on on the TCS
to switch on autoguiding. To switch off the autoguiding, type ag-off.
Guiding on moving targets
If you are observing moving targets, view the page Tracking of Moving Targets, in the Appendix.
Focusing the Telescope
The telescope focus depends on temperature and zenith distance. These
relations have been measured to a high accuracy and the corresponding
corrections are applied in real time by the TCS (note
that you will not see these corrections in the focus value displayed on
the TCS since this value is kept constant to avoid confusing the observer).
After opening the dome ports and hatches, it takes about 2 hour for the dome/telescope to reach night-time temperature equilibrium. We encourage the observers to check the focus a couple of times during
the night. Below we describe how to set and monitor the focus in general
terms, and then specifically for our different instruments.
- The easiest way to focus the telescope is to use script
alfosc.focus
- In the evenig when it is dark enough, type in the sequencer window e.g.
alfosc.focus
this will setup ALFOSC for focussing using
alfosc.focuspyr-setup,
move the telescope to the optimal field (-a-option),
take a ten seconds integration, analyse the focuspyramid image,
find the best focus,
adjust the telescope focus, if needed, take a new integration,
analyse the focuspyramid image,find the best focus,
adjust the focus and take more
integrations until the "best telescope focus" difference
between subsequent frames is less than 13 focus units or the maximum number
of images is reached.
Note1, if seeing is bad you might have to increase the integration time
(-t-option).
Note2, if seeing is bad, sometimes no pyramids are found automatically.
You can analyse the image using
alfosc.focuspyr script or use
the default ALFOSC focus
and focus the telescope later when the seeing has improved.
- if you need to focus during the night use
alfosc.focus -t 12 -a nearest
or if you pointing at a suitable field already:
alfosc.focus -t 12 -a noacq
- Remeber to take the focus-pyramid from the beam and reset the
CCD windowing
- If you wish you can use
less automatic way to find the best telescope focus:
- Preset the telescope to
focus star field
(e.g. read-cat focus.cat or read-cat focus_bright.cat ).
- Use the image acquisition software recommended for the instrument
you are using.
- Change the telescope focus by typing foc-pos value on
the TCS where value is the new focus value.
- If you, for any reason, cannot focus the telescope, use the default
focus specified in Table 1. You can also change
the telescope focus by a few units below and above the current value to
manually find the best focus. Type expose time in the
sequencer window (where time is the exposure time in
seconds) to obtain an image of the focus field. The exposure time should
be set to 10 to 15 seconds in order to fully sample the seeing frequencies.
Use the 'imexam' command to analyze the image in the DS9 window. Press
the key r to view the radial profile and to find the fwhm of a
star (the pixel scale for each instrument can be found on the instrument
pages).
For focusing with ALFOSC, a focus pyramid is used,
an optical device which splits the light beam into four segments, each
of them producing an image of the star on the CCD. The distance between
the four images is linearly dependent on the focus of the telescope. By
measuring the distance between the four images of a star, the correct
focus of the telescope is given independently of seeing variations.
Note that the internal ALFOSC focus has a default
value of
1610
and is found to be very stable. For ALFOSC
polarimetry the recommended focusing procedure is a bit different
from the one described below.
If you wish to observe with several filters, determine first the telescope
focus with no filter in the beam, and use this as a reference focus value.
Set the correct telescope focus value for no filter by typing foc-pos
value (make sure that foc-del is set to zero while
evaluating the focus). Then find the appropriate filter focus offset to be
applied for each filter and set foc-del offset always before
using that filter. If no offset is available, determine the focus once more
according to the suggested steps below - this time with having the filter
in the beam - and note down its offset.
Observing using OB
- Compile script from the Visplot
or from the visitor OB queue or the staff OB queue
- Open the OB queue
visitor: NOT frontpage > Resources for Observers > Observing Tools > (NOT Reporting) OB Queue
staff: intranot > OB Queue
- Select correct observations
visitor: Submit your proposal number and select observing mode "Regular program observed in visitor mode"
staff: Select observing mode "Nordic Service" / "Technical Night"
- Select group
- Select block
- press “compile OB”
- To run an OB script, locate it in your folder,
[obs@selena][ALFOSC]$ cd ~obs/scripts/proposal-ID
[obs@selena][ALFOSC]$ ls -lrt
- Copy and paste the "scriptname" on the command line: and run it e.g.
[obs@selena][ALFOSC]$ "scriptname"
- Follow the instructions in the sequencer carefully. If interaction from observer is needed you will be notified.
The first interaction needed is to confirm the guiding. For Alfosc imaging OB's no other interaction is needed. For Alfosc spectroscopy OBs, the script will then start by taking an acquisition image, and you will have to identify the desired target in the field, by placing the mouse on the target and pressing a+q for point sources or x+q for extended sources. Once identified, the script will take another acquisition image and ask to identify the target again in the same way. Finally, the OB will take an image of the slit. If the star is there and the acquisition is done correctly, the OB will ask you to press enter TWICE. Otherwise, you can repeat the acquisition. Once these interactions have finished, the observations of the spectra will start here. For other instrument interactions (after confirming guiding) may differ, but there will be always explanation in sequencer.
Look more detailed instructions about OB queue from here.
Imaging manually
For details see
the ALFOSC pages.
Note, the detector is linear (better than ±1.0%) up to ~550-600 kADUs
(full well= 700 kADU/pixel, 135ke-/pixel) and the digital
saturation is 232ADU.
Typical bias level is about 10 kADU.
See more details from the
detector page.
It is recommended to offset the telescope between the integrations,
if possible. Using the dithered images you can compensate bad pixels,
correct cosmic ray hits and fringing for the red filter.
Typical offset size is 10-15 arcseconds.
Most of the used commands can be given also using the numeric keypad on the right side of TCS keyboard.
Add your target to the TCS-catalogue and preset the telescope
[obs@selena][ALFOSC]$ tcs.append-object my_star 12 12 12 +23 23 23 2000 0 0 0
[obs@selena][ALFOSC]$ tcs.ag-off
[obs@selena][ALFOSC]$ tcs.goto-object my_star
or
[obs@selena][ALFOSC]$ tcs.ag-off
[obs@selena][ALFOSC]$ tcs.guide-object my_star
Setup the ALFOSC wheels and adjust the telescope focus, e.g. for filter #12
Finally start observing, e.g. single 300sec exposures at each
pointing of a dither pattern with 12 arc sec offset
You can examine an image using the
ALFOSC DS9 and analysis scripts
Spectroscopy manually
Add a target to the TCS catalog, point the telescope with parallactic angle, and
start guiding
[obs@selena][ALFOSC]$ tcs.append-object my_star 12 12 12 +23 23 23 2000 0 0 0
[obs@selena][ALFOSC]$ tcs.guide-object-with-parallactic my_star
In case you want to get more
than one target on the slit, make a short full-frame exposure and
use slitrot to determine the required field rotation, change the rotator angle and restart guiding:
[obs@selena][ALFOSC]$
alfosc.expose 10
[obs@selena][ALFOSC]$
alfosc.slitrot
[obs@selena][ALFOSC]$ tcs.ag-off
[obs@selena][ALFOSC]$ tcs.field-rotation <rot-angle>
[obs@selena][ALFOSC]$ tcs.get-guide-star
[obs@selena][ALFOSC]$ tcs.auto-positioning-retry
Do target-to-slit
acquisition. A list of valid slit-names
can be found here.
Note that alfosc.acquisition
invokes alfosc.wcs-align
which toggles the DS9 display to either the North=Up orientation (easy to find your target with finding chart) or the normal detector
X,Y orientation. You can also use the DS9 buttons (in the 'Frame' pull-down menu) to set or unset this.
As for doing a blind offset, this is just doing a telescope offset after
having acquired the target from which to apply the blind offset.
Choose the desired CCD setup (windowing, binning), e.g.
Put in the grism, e.g. grism #4
Make optional lamp calibrations with the telescope pointing at the
target, e.g. 3 Halogen flats and 1 Helium-Neon arc. Approximate
exposure times for calibrations are listed for each grism in this table.
[obs@selena][ALFOSC]$
alfosc.calibexp -lmi -n 3 -o "Halo at my_star" Halogen <expotime>
[obs@selena][ALFOSC]$
alfosc.calibexp -o "HeNe at my_star" HeNe <expotime>
Start the on-target integration, e.g.
Once the exposure is finished the spectrum will be on-line extracted
by alfosc.quickspec. To
configure the behaviour of quickspec use
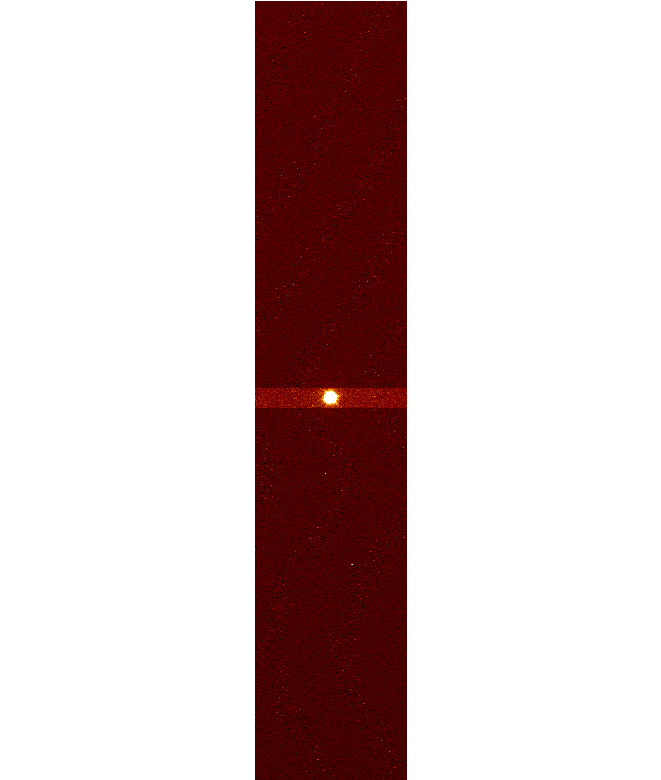
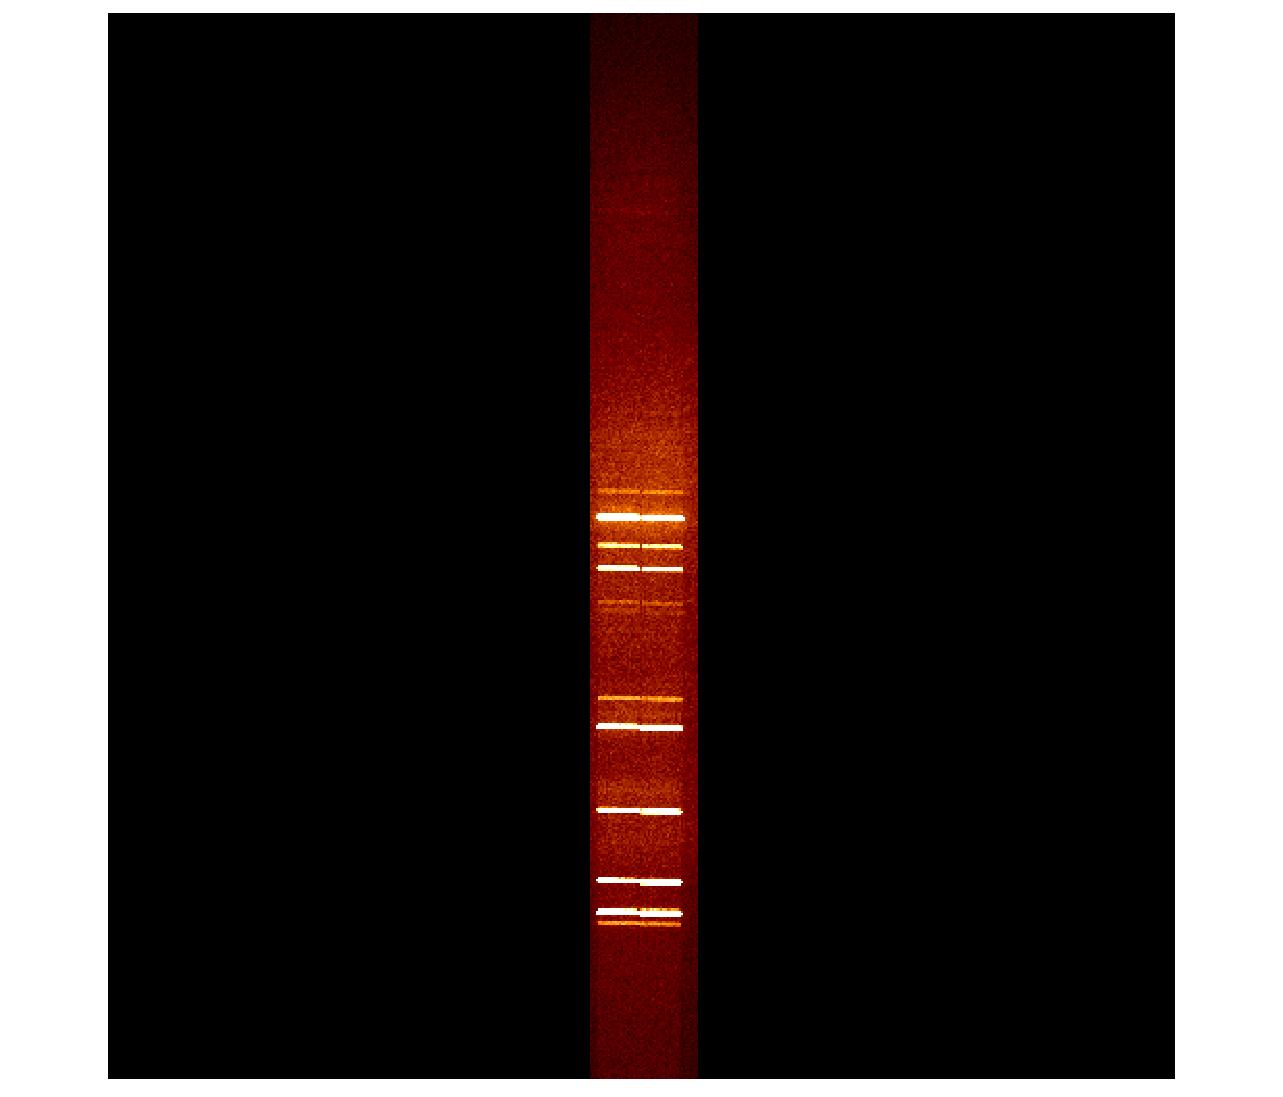
An example of an image of the slit, with the star in the slit,
and of what a target spectrum looks like, are given below.

Polarimetry manually
For details see
Polarimetry with ALFOSC.
Note, the detector is linear (better than ±1.0%) up to ~550-600 kADUs
(full well= 700 kADU/pixel, 135ke-/pixel) and the digital
saturation is 232ADU.
Typical bias level is about 10 kADU.
See more details from the
detector page.
First add your target to the TCS-catalogue and preset the telescope.
Make sure that the field rotation is as desired, typically "90".
[obs@selena][ALFOSC]$ tcs.append-object my_star 12 12 12 +23 23 23 2000 0 0 0
[obs@selena][ALFOSC]$ tcs.guide-object my_star
Imaging polarimetry with FAPOL
Note that the internal ALFOSC focus will be automatically offset by -870 units
when any of the calcite plates/polarimetric slitlets are entered into the beam
and the alfosc.focus-offset script is run.
The default instrument focus for ALFOSC is 1610 and the focusoffsets are
here.
Setup all 5 ALFOSC wheels, adjust the focus and take a test image to
identify the field. Offset the telescope using e.g.
teloffset 20 -15, if needed.
If your target is very bright or easy to identify you might skip
this full frame image.
If you are pointing to the right field, setup all 5 ALFOSC wheels for
imaging polarimetry, move the retarder plate in the beam, adjust the
telescope focus, window the CCD and take a test image to estimate the
integration time. The test image through the full polarimetric setup
is recommended, as high S/N is needed.
Take your data, e.g. one set of 90 seconds exposures with the lambda/2 retarder plate angles 0°, 22.5°, 45°, and 67.5°.
Or if you have the lambda/4 retarder plate installed for circular polarimetry, take e.g. 100 sets of 30 seconds exposures with retarder plate angles 0° and 90°.
NB! For both of the commands above: if you wish to use your own window OR a binnning different from 1x1, you must first set
the windowing commands and next the binning, and then run the above scripts with the flag -nowindow.
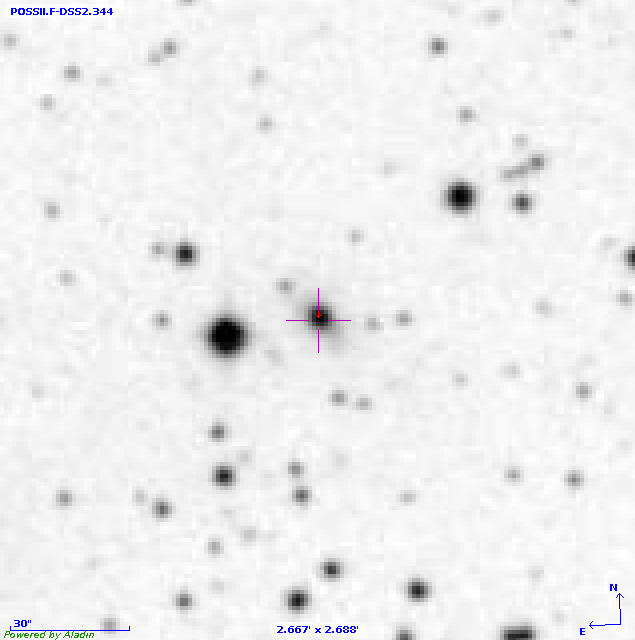
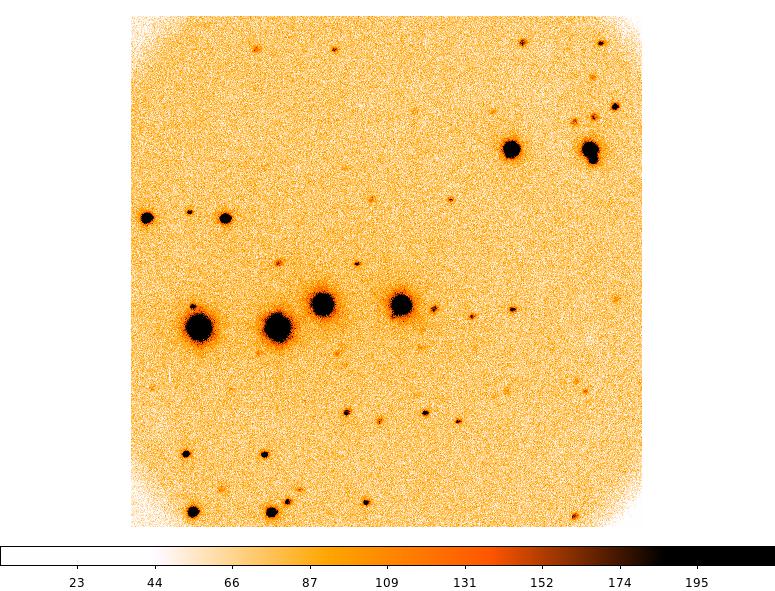
For example, below is a DSS image and FAPOL image of the same field.
For quick look analysis you can use
qilpol for linear polarimetry
or
qicpol for circular polarimetry
Spectro-polarimetry with FAPOL
Add a target to the TCS catalog, point the telescope with parallactic angle (NB! Note polarisation position angle correction!), and
start guiding
[obs@selena][ALFOSC]$ tcs.append-object my_star 12 12 12 +23 23 23 2000 0 0 0
[obs@selena][ALFOSC]$ tcs.guide-object-with-parallactic my_star
Acquire your target on the polarimetry slitlet using the interactive alfosc.acquisition script
which will:
1) put the retarder plate in the beam, 2) put in the Calcite for the acquisition image, and 3)
use alfosc.focus-offset to correct both the internal ALFOSC focus and the telescope focus. Make
sure you have no filter in the beam. NB! Select the left component of the target in the
interactive acquisition script! NB! Note that you may have to manually finetune the
exact placement of the target in the slit. Use teloffset and expose in
another sequencer window for this.
When the star is centred in the slit, put in the grism.
Window the CCD to an appropriate size.
Take your data, e.g. one set of 600 seconds exposures with 4 retarder plate angles (0°, 22.5°, 45°, and 67.5°), typically used for linear polarimetry with the
lambda/2 retarder, as follows:
Or, in the case of circular polarimetry with the lambda/4 retarder, take for instance 3 sets of 300 second exposures with 2 retarder plate angles
(0°, and 90°), as follows:
Note that in order to use the ALFOSC calibration lamps, you first need to take the FAPOL carriage with the retarder plate out of the beam!
Switch on the lamps of your choice and take your calibrations with the grism and slit in the beam, using the same CCD window as for your targets.
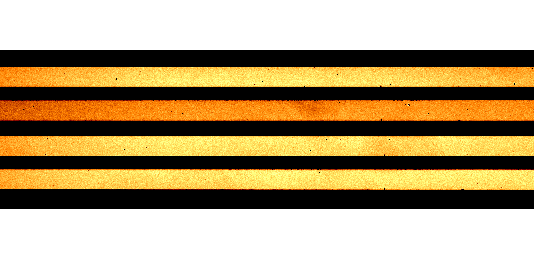
The the science frame and He arc lamp image should look like this:

Imaging polarimetry with the WeDoWo
For WeDoWo imaging the 10 arcsec wide slit is used as a mask. Here is an example of a windowed (see below) domeflat:
Typical commands for WeDoWo imaging in the i-band (filter #12) could for example be to first take a acquisition image with the required filter in the beam:
When the target is on the slit, window the CCD, move the WeDoWo into the light path, and expose:
Typical night time calibrations include high and zero polarization
standard stars.
If you want to have two targets on the slit use alfosc.slitrot
End of the night
Morning skyflats
Take more twilight flats, if needed. Note that if you need to keep the telescope open after sunrise,
you can type on the TCS keep-telescope-open x for instance, for x minutes extra (carefull, do not point towards sun!). Otherwise the
telescope will automatically close at sunrise, but it does give you a warning.
Remember that with the morning skyflats the order of the filters is opposite than with the evening flats, because sky is
getting brighter, not dimmer.
Closing the telescope
- When observations finish and the sky is brightening turn the guide TV off
by typing tv-off on the TCS, i.e. before potentially taking morning skyflats.
- Put the telescope to zenith by typing zenith or pressing the key
Start/Stop and then Zenith (0). This will park the guide probe and it also sets
rot-man. Wait for Rotator -90°.
- Park the building by pressing the key Start/Stop and then the
key 4, Park Building. This process can take up to 8 minutes. Building will stop at Az
≈ 119°, Alt ≈ 90°.
- Close the mirror covers with the TCS command c-m-c or by pressing
key 3, Close Mirror Covers (if you are in the Start/Stop menu).
This takes 42 seconds.
- Close the lower hatch by typing c-l-h or pressing key 2, Close
Lower Hatch. This takes about 3 minutes.
- Close the upper hatch by typing c-u-h or pressing key 1, Close
Upper Hatch. This takes about 5 minutes. If timeout occurs or hatch does not move, see
TCS Manual p. 43.
NB: When the upper hatch has closed the dome cooling
will start and the staircase cooling will stop.
- Close the side ports by typing on the TCS UIF close-side-ports.
Check that all sideports did close by checking status in TCS page 3, type sh-p 3. If a
sideport does not close, go to the dome and flip the black knob from remote to local and press
the green button to move the sideport in question. For more details, see
Sideport Operation.
- Power down the telescope. After all of the above have been completed and the telescope is "Idle", type
power-off on the TCS, then type sh-p 1 to display the telescope power units.
Wait until all the telescope power displays show "off".
- Have a look in the dome at hatches and telescope, to check for any faults that
might have occurred.
- Run the calibration script (if you observe with ALFOSC or NOTCam),
i.e. alfosc-calibs ALxxxx or notcam-calibs NCxxxx, where xxxx refer to the file prefix
for the night.
- Turn down the TCS screen brightness. Use the knob on the right-hand side of the TCS
monitor, near the power switch. Never turn the TCS monitor off.
- Turn off monitors. Turn off the two autoguider monitors and dome TV camera monitor.
- Turn on the control room webcam and the dome webcams. Make sure that the webcams in
the control room as well as in the dome are turned on before you leave.
- Complete the WWW report forms. Fill in and submit Internet
NOT End-of-Night Report.
Be sure to include any faults that occurred and submit a
fault report,
so we can attend to problems promptly. If it is the last night of the observing run, also fill in and submit
Internet NOT End-of-Run Report.
- Lockup the dome. Lock the outer dome door when you leave the building.
- Clean up the kitchen/lounge area in the service building and switch
off all lights when you leave.
- Lockup the outer door in the service building before leaving for the Residencia.
Running automatic morning calibrations
ALFOSC has an automated script that takes biases and spectral flats and arcs for all setups and windows used during the night. Per setup, it takes 11 biases, 5 spectral flats, and 1 arc for each arc lamp.
where "ALAa19" should be replaced with the date-string of the current night. It may take a while, depending on how many different setups were used. Just leave the script and the obssys running in the control room. You can go to bed now.
If there is need for more FIES calibrations you can do them together in single command line with ALFOSC calibrations
Note that, if you are running FIES commands in ALFOSC sequencer you need "fies." prefix (and other way around "alfosc." prefix in FIES sequencer). Above format will work in both ALFOSC and FIES sequencers.
Note: If the command fails, the staff will be alerted by e-mail.
Shutdown the ALFOSC observing system
Important: Please leve the observing system open and running when you leave the telescope in the morning. This allows staff at sea-level to use it remotely for testing and diagnostics during the day.
The following procedure stops the ALFOSC observing system:
- In a terminal (not a sequencer) window type
[obs@selena ~]$ shutdownobssys alfosc
- Wait for all the control programs to close.
- Close remaining windows manually.
Troubleshooting
If you have ...
- ... cannot reset the safety system:
- ... no light on the CCD -- check:
- Dome open, mirror cover open
- Lower hatch not obstructing at low altitude
- Guide probe out of light path
- Camera probe in correct position
- FASU shutter open (if using ALFOSC)
- Correct filter in instrument
- Correct telescope focus
- If it is cloudy
- Check all the above again. If there still is a problem, then phone duty staff.
- If MOSCA or StanCam image has a count level of 0, this can actually mean saturation and you should reduce the
amount of light falling on the detector.
- StanCam shutter controller has power (if using StanCam)
- ... wrong field on CCD -- check:
- Coordinates of field
- Epoch of coordinates
- No typos in entering coordinates in TCS
- Field rotation is correct
- ... no guide star on guide probe screen -- check:
- Dome open, mirror cover open
- Guide probe in correct position
- Field and rotator angle
- TV switched on
- TV filter open
- TV focus correct
- Try typing in the X and Y values of another Guide Star fromthe
The 10 brightest currently available Guide Stars
- If it is cloudy
- ... lost tracking/guiding:
- How close to the zenith are you? (Good guiding and tracking is guaranteed only 5 degrees
or more from zenith).
- ... changing tv filter does not work:
- at TCS type in the command 'Initialize-TV-Filter'.
- ... ctrl x', 'ctrl g', 'ctrl t' and 'ctrl v' commands on the TCS give incorrect functionality,
e.g. telescope offset rather than star box movement.
- wrong function key menu on the TCS keyboard press keypad key 5.
- ... "building crash":
- ... other TCS problems
- Press the keypad key labelled Log and then keypad 2 to see the latest entries in the
TCS log.
- ... acquisition: slitoff/fiboff unresponsive
- Using the mouse to set the contrast while image is loading?
Using the mouse to set the contrast while this process takes place can cause DS9 to crash. Best procedure is to wait tuning the contrast level until the image has been fully loaded into DS9, and zoom / contrast levels set.
A DS9 crash while in 'imexam' while leave the postprocessing system in a non-workable state.
Rather than shutting down the whole observing system to recover, it is in most cases sufficient to run the sequencer command 'killimexam'.
See also next item.
- ... ds9 shutting down while doing acquisition
- Using the mouse to set the contrast while image is loading?
Using the mouse to set the contrast while this process takes place can cause DS9 to crash. Best procedure is to wait tuning the contrast level until the image has been fully loaded into DS9, and zoom / contrast levels set.
A DS9 crash while in 'imexam' while leave the postprocessing system in a non-workable state. Rather than shutting down the whole observing system to recover, it is in most cases sufficient to run the sequencer command 'killimexam'.
- ... "sequencer/obssys" does not respond or behaves badly:
- Standard procedure in such circumstances is to restart the observing system using 'shutdownobssys'
(from a terminal window) followed by 'startobssys'.
- ... lisa frozen, not responding, e.g. can not log out using the foot icon
- if you have a working terminal, try "$ killall panel", wait until the panel restarts and then logout as usual
- if there's no terminal available, you can use florence to ssh as obs into the observing computer you've been using,
and type the killall command.
- if you have no terminal available, etc. press the "Ctrl" and "Alt" keys and then press "Backspace".
That will kill the X server and force a logout
If you encounter a fault or a problem with the instrument, the computers or the telescopeduring the night, then fill in a
Fault Report.
Troubleshooting ALFOSC
Or, if you have ...
- ... ALFOSC UIF does not start with an error
"The ALFOSC UIF did not
start. Restart the observing system.":
- Power cycle the motor controller and try again
- Check that the network cables are connected and try again
- ... FAPOL
retarder plate is out of beam, going red, although FAPOL was already out
"Timed out waiting for FAPOL carriage to arrive at position Out":
- Initialize the polarization unit. If this fails try to
- Restart obssys. If this fails try to
- Power cycle FASU controller and restart obssys
- ... problems with the ALFOSC CCD3com data-acquisition
system, i.e. any Sequencer command related to the CCD system:
If you encounter a fault or a problem with the instrument, the
computers or the telescopeduring the night, then fill in a Fault
Report.
Appendix
Tables for Instrument Settings
| instrument |
field-rot |
i-p-a |
camera probe |
foc-pos |
tv-foc |
orientation |
c-w-h |
| ALFOSC |
+90 |
0 (horizontal slits)±90 (vertical slits) |
c-p-p |
26630 |
510 |
North ↑ East ← Horizontal slits: E-W (P.A. = ±90) |
0.75 |
| FIES |
0 |
N/A |
c-p-s |
26880 |
510 |
North ↓ East ← |
N/A |
| NOTCam |
-90 |
-90 |
c-p-p |
26750 |
500 |
North → East ↑ |
0.95 |
| MOSCA |
-90 |
N/A |
c-p-p |
27160 |
450 |
North ↑ East ← |
0.55 |
| StanCam |
0 |
N/A |
c-p-c |
26330 |
500 |
North ↑ East ← |
N/A |
| SOFIN |
0 |
-90 |
c-p-p |
26950 |
510 |
N/A |
0.9 |
| TurPol |
0 |
N/A |
c-p-p |
29450 |
650 |
North ↑ East → |
0.12 |
Table 1a shows the values of the: field rotation(field-r), instrument-parallactic-angle (i-p-a),
camera probe, focusposition (foc-pos), TV focus (tv-foc), field orientation andcounter weight height (c-w-h) for
the different instruments. On the TCS, type thecommand followed by the value, for instance field-r -90.
The default focus value stated for NOTCam is for the K band in imaging mode using the WF camera (internal camera
focus of 5650).
| From |
To |
foc-delta |
| ALFOSC no filter |
StanCam R-filter (#10) |
-260 |
| MOSCA R-filter (#106) |
StanCam R-filter (#10) |
-155 |
| NOTCam Ks-filter (WF) |
StanCam R-filter (#10) |
-380 |
Table 1b shows the default focus offsets between the instruments.
| Filter name |
NOT filter number |
foc-del |
| Bessel U |
#7 |
-70 |
| Bessel B |
#74 |
-85 |
| Bessel V |
#75 |
-10 |
| Bessel R |
#76 |
-80 |
| Interference i |
#12 |
-5 |
Table 2 shows the focus offsets for ALFOSC filters, U, B, V, R, i. More filter offsets are
found here.
Analyzing data on-the-fly
The following tools are only intended for quick checks of your data while observing. Any deeper analysis should take place on the FLORENCE machine or on your own laptop (see Recommended data transfer methods).
After read-out, the image is always automatically displayed in the ALFOSC DS9 window to the right. If you need to bring up a previous image, it can be done with the following sequencer command:
[obs@selena][ALFOSC]$
display ALAa190017.fits
The filename is relative to the /data/alfosc/ directory, so to access data from a previous night you need to add the folder name, e.g. "ALAa19/ALAa190017.fits".
Image analysis (imexam)
If you type the command imexam in a sequencer, it will start an IRAF imexam session for the image currently displayed in the DS9 window. Hover the cursor over the image, and use the key commands below:
| Key | Command description |
| ? | Print help |
| x | Print coordinates |
| a | Aperture radial photometry measurement |
| r | Radial profile plot (see above for output) |
| s | Surface plot |
| e | Contour plot |
| c | Column plot |
| l | Line plot |
| q | Quit |
Output is displayed in the sequencer. Note that imexam cannot be used while running alfosc.acquisition.
1D spectrum analysis (quickspec)
When a spectrum is recorded, it will be extracted automatically with quickspec and open in an IRAF plot window on the LISA screen shortly after the raw image appears in DS9. The extracted spectrum is stored in /data/reduced/alfosc/ and can be accessed from FLORENCE.
The spectrum is plotted with splot and a number of handy key commands are available in the plot window:
| Key | Command description |
| % | Plot a different band (select number):
- Spectrum (weighted, cleaned, background fit subtracted),
- Spectrum (raw, only background fit subtracted)
- Background fit
- σ (weighted, cleaned, background fit subtracted)
|
| ( | Plot previous aperture/target (or band, if only one aperture) |
| ) | Plot next aperture/target (or band, if only one aperture/target) |
| w | Toggle windowing mode |
| w-f | Flip the x axis. |
| w-g | Flip the y axis. |
| w-j | Set left edge of window. |
| w-k | Set right edge of window. |
| w-t | Set top edge of window. |
| w-b | Set bottom edge of window. |
| c | Clear windowing and redraw the full current spectrum |
| q | Quit |
Similar to the display command, it is possible to re-run quickspec on previous images (it will overwrite the previous extraction of the same observation):
[obs@selena][ALFOSC]$
quickspec ALAa190017.fits
As default, quickspec selects and extracts the brightest dispersed target in the image, and plots it with an approximate wavelength scale. It is possible to customize this behavior with quickspec-config. The following commands changes the number of apertures/targets to 2 and re-extracts the spectrum (useful for MOS or longslit spectroscopy):
In the plot window, you can now switch between apertures/targets using "(" and ")". Note that the wavelength scale is not shown when extracting multiple apertures. For selecting the apertures interactively, set edit=yes (see IRAF task apall)
Be aware that the settings made with quickspec-config are sticky. Default settings can be restored with the following sequencer command:
Field Rotator
In an alt-az telescope the field rotator is used to keep the orientation on
the sky fixed while tracking. When the field rotator is in automatic mode,
which is the default, the TCS command field-rotation value sets
the rotator such that value is the angle between the sky and
the instrument.
The default value of the Field Rotator is different for each
instrument and can be found in Table 1.
The field-rotation value will be set to the default angle when executing the script
setup-tel-alfosc
The rotator-position is the physical position of the rotator
with respect to the telescope fork, and it has a limit at +- 200
degrees. Its current value is shown on the TCS status display together
with the time-to-reach-limit in minutes.
Before reaching the limit, the TCS will send a warning and suggest you
to turn the rotator 360 degrees at any convenient moment. This can be
done manually with the TCS command ro-tu-360 after switching
off autoguiding with ag-off. Note that this is possible only
in the overlapping ranges [-200,-160] and [160,200].
If the limit is reached, the TCS will eventually, after repeated
warnings, perform the full rotation automatically (whether or not an
observation is ongoing).
The exposure commands for ALFOSC, FIES, MOSCA
and StanCam check whether the rotator limit is reached within the exposure time,
if this is larger than 300 seconds. For NOTCam, where typically multiple short
exposures are made, this is not the case.
If you want to follow the same target continuously for
many hours, and you wish to avoid having to turn the rotator, for
instance because you want your target on exactly the same pixels all
the time (transit light curves), you might consider using a different
field-rotation value, based on the time-to-reach-limit value displayed
on the TCS UIF.
For the case that right after the telescope pointing the rotator will
start off in the overlapping rotator range, the telescope can be told
to automatically point using the rotator position that allows for
maximum tracking time, with tcs.set-rotator-standard, which is
the default behaviour. For details see
the TCS documentation.
If you have many pointings with relatively short exposures or you keep
pointing towards the same region of the sky, you may save some
pointing overheads by making the TCS choose the fastest rotator slew
to reach either of the overlapping rotator ranges: set the rotator to
fast mode using tcs.set-rotator-fast, which is a sticky
command. To go back to the default mode, use the command
tcs.set-rotator-standard .
Note that if you do slit-spectroscopy only,
setting the field angle will usually not be useful as you probably would
like to observe on the
parallactic angle, in which case the field angle will be different for
each target. To observe in this mode, on the TCS simply type
instrument-parallactic-angle value (or i-p-a
value for short) at the start of your run. See Table 1 for correct value, depending
on instrument. For presetting to target when observing in this mode,
choose the preset option Preset to par ang (6) instead of
the usual Preset to selected (4). Upon every preset the
rotator position will be close to the value defined as above at
start. If you want to know your current field angle, for instance to
be able to compare an acquisition image with a finding chart, then
type sh-p 1 and look at the values of RefFieldRot and
Instr.Par.Angle.
Note that when swapping from ALFOSC
spectroscopy to ALFOSC imaging you must remember to set the rotator
to field-r +90 if you want North up and East to the left in
the images.
Camera Probe
The Camera Probe is used for the standby Camera (StanCam) and for FIES and should be
put in park position for all other instruments. Put the Camera Probe in the correct position
by typing the TCS command as indicated in Table 1.
The correct Camera-Probe position will be set when executing the script
setup-tel-alfosc
Data saving and retrieval
Instructions on how to retrieve data from ALFOSC, NOTCam, StanCam, MOSCA and
FIES are found in
Data Download instructions.
Only principal investigators have direct access to their data on the data server.
The principal investigators can grant access to their data by generating and
distributing a shared link. Details on how to do so can be found in the instructions.
General information on NOT FITS-headers can be found
here.
Accessing raw and reduced data at night
The computer called florence is setup for you to make a quicklook analysis of
the incoming data, e.g. by starting up DS9 and IRAF:
   > cd newiraf
   > ds9
   > xgterm -sb -fn 9x15 -sl 400 -cr red -title IRAF -e ecl &
For the different instruments we have on-line reduction programs running, that
deposit the reduced products on a disk accessible on florence.
The raw and reduced data files can be found on florence under directories
/data/<instrument-name>/
/data/reduced/<instrument-name>/
Copying data products from florence over the wifi in the NOT control room to your
own mobile computer is no longer feasible. Use the
Data Download tool.
Archival requests
To obtain NOT data from our archive, first compile a list of file
names of the calibration and science data to be retrieved, using our FITS archive.
Note that this archive does not show the
data obtained in the latest twelve months, due to the propriatary
period.
Then please contact staff and send the list of file names to be
retrieved, such that we can locate the data in our archive and make
them available through FTP.
Compensation for override observations
If your program was interrupted by a Target-of-Opportunity or
another override observing program, you are entitled to payback
time. Such compensation for time lost during your allocated
observing run (whether in visitor or service mode), is claimed
back through the submission of Observing Blocks (OBs) using our
OB Generator. The observations will be executed accordingly
in service mode by staff during Nordice Service nights, and you
will be informed by email when observations are made and where
to retrieve the data.
Using the OB generator to claim payback time
Access the
Observing Block Generator and login to your account, or if
you are a new user, please register. When you are logged in, add
your proposal for which you claim compensation time.
There are help buttons at every level of the OB generator, and you
can also get support and give feedback through
obsupport@not.iac.es.
If you have questions about how to define OBs and/or Observing
Sequences, please contact
service@not.iac.es.
For your OBs to be carried out as compensation for time lost to
overrides, please make sure to select OB Group type "Payback".
The ALFOSC CCD and its controller
The detector is linear (better than ±1.0%) up to ~550-600 kADUs
(full well= 700 kADU/pixel, 135ke-/pixel) and the digital
saturation is 232ADU.
Typical bias level is about 10 kADU.
The full field of view is about 7.3 arcmin square.
See more details about the system from the
detector
and
CCD-controller features pages.
The CCD shutter and exposure length
The shutter
is 86 milli second faster than the actual requested time,
i.e. requested one second integration keeps the shutter open for
0.914 seconds.
The minimum integration time is 0.3 seconds (with correction),
this is the time for the sequence
"move the shutter to open position - stop the shutter movement -
move the shutter to close position".
Also, for the bias frames, i.e. the shutter have been kept closed
the FITS-header KEYWORD EXPTIME will have value of 0.002.
If you wish to correct the "EXPTIME" FITS-header keyword you can use
e.g. iraf/hedit-task
Correct the bias frame integration times to 0.00 seconds and
apply the 86 millisecond correction to all the frames e.g.
iraf>hedit ALwa01*[0] exptime '(exptime!=0.002 ? exptime - 0.086 :0.0)' ver- sho+ add+
iraf>hedit ALwa01*[1] exptime '(exptime!=0.002 ? exptime - 0.086 :0.0)' ver- sho+ add+
Correct the integration times between 0.1 and 0.3 seconds to 0.3 seconds
e.g.
iraf> hedit ALvf2600*[0]* exptime '(exptime < 0.35 && exptime > 0.0002 ? 0.3 : exptime)' ver- sho+ add+
iraf> hedit ALvf2600*[1]* exptime '(exptime < 0.35 && exptime > 0.0002 ? 0.3 : exptime)' ver- sho+ add+
Readnoise and the CCD read speed
The CCD is operated at 200 kpix/s per default, giving a read-out-noise (RON) level around
4 e-, which in normal circumstances is much less than the sky noise.
Faster readout is offered at 400 speed.
For some spectroscopic setups a lower RON level is required, which can be obtained
at the price of slower read-out, using 100 speed.
See the
RON vs speed table.
Commonly Used Instrument Commands
| Command |
Comments |
| CNTR-C |
kill ongoing command or script |
| abort |
kill ongoing exposure |
| readout |
reads out ongoing exposure |
| object text |
Sets the value of the FITS keyword OBJECT to text |
| autosave_on |
Turns on autosave. For off, type autosave_off |
| rempath link |
Sets the remote saving path to specified link |
| remsave_on |
Turns on remote saving. For off, type remsave_off |
| bin n |
Sets the binning factor in both X and Y directions to n |
| xbeg n |
Sets the X beginning to n (use ybeg for y). |
| xsize n |
Sets the X size to n (use ysize for y). |
| expose t |
Makes an exposure of t seconds. To abort the exposure press Ctrl-C
and type abort in the sequencer window. |
| mexpose t n |
Makes n exposures of t seconds |
| dark t |
Makes an dark exposure of t seconds |
| mdark t n |
Makes n dark exposure of t seconds |
| teloffset n m |
Offsets the telescope in the CCD X,Y direction by the amount n in the X direction
and m in the Y direction. n and m are given in arcseconds. |
| resetxy |
Resets the CCD to unbinned full-size readout |
TCS interface
Here is incomplete list of TCS screen parameters and keyboard actions. More complete information can be found from TCS webpage or TCS manual.
TCS screen
- page number
- TCS access code
- command line
- currently active keypad commands
- status of hatches and mirror covers
- camera probe status
- status of telescope power

TCS keyboard
- keypad for commands
- opening and closing commands
- open catalogue page
- open status page
- help
- use these to type numbers in commands

Commonly Used TCS Commands
| Command |
Comments |
| ag-on |
Turns autoguiding on |
| ag-off |
Turns autoguiding off |
| auto-positioning-full |
Turns the guide star auto positioning to full-automatic |
| auto-positioning-retry |
Try again to bring the guide star in the guide box |
camera-probe-stancam
camera-probe-ccd |
Moves the camera probe to ccd position (for StanCam) |
| camera-probe-park |
Moves the camera probe to park position (for ALFOSC) |
camera-probe-fies
camera-probe-split |
Moves the camera probe to split position (for FIES) |
| field-rotation fieldangle |
Sets the field rotation to fieldangle |
| focus-position n |
Moves the telescope to focus position n |
| focus-delta n |
Applies a focus offset to the current telescope focus |
| get-guide-star 2 |
Find another guide star |
| instrument-parallactic-angle n |
Defines the parallactic angle for following presets |
| read-catalogue name.cat |
Reads the catalogue |
| tv-on |
Turns on the guide TV |
| tv-filter name |
Selects the guide TV filter where name can be either closed, grey, open, red,
yellow or blue |
| tv-foc pos |
Changes the guide TV focus to position pos |
|
|
| append-object string |
appends an object to the TCS catalog |
| goto-object Object |
moves telescope to "Object" |
| find-object |
selects an object in the TCS catalog |
| preset-with-parallactic-angle-to-selected |
moves telescope to the selected object, with parallactic angle |
Tracking of Moving Targets
At the NOT there are two main modes of tracking a moving object (planet, comet, asteroid, satellite):
1) differential tracking with auto-guiding and 2) differential tracking without
auto-guiding. Which of these to use, depends in practice on the target speed and how long the
observations take. We have been working with speeds as high as 700"/hour with auto-guiding.
For targets faster than 1000"/hour we recommend blind tracking with updating of differential
rates to the TCS (currently under testing).
Since September 2019 the OB generator
allows for non-sidereal tracking.
The differential rates are given in the FITS headers in the keywords DTRCK_RA and DTRCK_DE.
Differential tracking with auto-guiding
In this mode, the telescope tracking is set to the differential rates, and in addition,
the auto-guider is used with the star-box set in motion with the same rates. This works for
as long as the box stays within the auto-guider TV-screen (approximately 70" field). When
the limit is reached, auto-guiding is no longer working. It is possible to reposition the
star-box and guide probe without affecting the telescope tracking, but there is a limit to
how many times this can be done before reaching the limit of the available guide probe area.
This depends
on the RA/DEC rates, the field-rotator angle, and the initial location of the guide star
inside the guide probe area. If this happens, you have to repoint to the target again.
If your target moves less than 70" over the execution time of your observations, you
can relax. If it moves more, you need to keep an eye on the star-box and manually re-position
it as described below.
Both the telescope tracking rate and the box-motion rate are given in RA/DEC coordinates,
i.e. dDEC/dt and dRA/dt (in arcsec per hour), and the cos(DEC) correction is taken care
of internally by the TCS. (In other words, if your RA-rate is given as dRA*cos(DEC), you
have to divide by cos(DEC) before entering its value.)
The two modes "optimal-ll" and "optimal-lr" are intended for fast objects or long
observations where auto-guiding is required. They give the maximum amount of guide-probe
repositionings.
Using ASTEPH
The sequencer script tcs.asteph is a wrapper script that connects to a tool made
for the NOT by Grigori Fedorets to access the ephemerides of targets, see also
Fedorets' howto. The most recent version of asteph
is an upgrade in October 2024 that allows for more options.
For known targets and the majority of cases it looks up JPL Horizons to find position
and rates at the location of the NOT (Z23), converts from dRA/dt*cos(DEC) to dRA/dt,
as required by our TCS, and lists the sequencer commands you need to point to target
and start differential tracking AND potentially differential auto-guiding.
We recommend to test tcs.asteph in the afternoon to see that
it understands your target name.
See example below (in green). Type tcs.asteph to get a listing of input parameters.
New! It is no longer needed to use escape double
quotes for a target name with space in it! (but it can also be used)
These are the steps to follow:
- Start your "moving object" OB in one sequencer terminal. This sets FITS headers correctly.
- In another terminal run asteph to get pointing and differential tracking information.
tcs.asteph [ -t asteroid|comet|planet|unconfirmed|horizons] [ -m ima|para|along-slit|optimal-ll|optimal-lr ]
                          [ -r full|half ] [ -g on|blind|update] [-e INTIME]  -n TARGET
-t default type is "asteroid"
option "planet" selects for instance the Jovian satellite Europa instead of the asteroid Europa
option "comet"
option "unconfirmed" for new objects not yet in the JPL database
option "horizons" allows for a free search in JPL Horizons (NB! only for experts)
-m default mode is "ima" using the default field rotation for imaging for current instrument
option "para" for spectroscopy orients the slit along the parallactic angle
option "along-slit" ALFOSC horizontal slit along the tracking direction
option "optimal-ll" orients the field to maximize the number of guide-probe repositions
option "optimal-lr" 180 degrees rotatated to above, both recommended for fast targets or long observations
-r default tracking rate is "full"
option "half" gives the half-rates of the differential tracking (sometimes requested for photometric calibration)
-g default is "on"
option "blind" will simply use blind tracking
option "update" outputs ephemerides to be used with "hitandrun" to update rates for very fast objects
-e default is current UT
option "INTIME" to give a requested time for today on the format HH:MM
-n targetname (mandatory, if it contains a space, use escape double quotes)
EXAMPLE (with autoguiding):
[obs@selena ~]$ tcs.asteph -n 2024 S1
3 -n 2024 S1
1 S1
cd /home/postprocess/asteph; source /home/postprocess/asteph/.venv/bin/activate; bash JPLHOR_to_NOTcat.sh           -n " 2024 S1 "

Running tcs.asteph...
Your input target is                        -  2024 S1
Your observatory is Nordic Optical Telescope, La Palma.
Today is  2024-10-15
Your computer says time is  12:20  UTC.
Retrieving data from JPL Horizons...
Data retrieved successfully from JPL Horizons.
The object being searched for is  ATLAS_C-2024_S1
Prefix for file names will be  2024-Oct-15.ATLAS_C-2024_S1
***************************
These tasks should be given to the TCS:
***************************
tcs.append-object ATLAS_C-2024_S1-12 11 01 42.10 -17 51 55.9 2000.0 0.0 0.0 14.038
tcs.ag-off
tcs.guide-object ATLAS_C-2024_S1-12
tcs.reposition-guide-probe 377.67 -46.3062
- Cut and paste the three first sequencer commands listed by tcs.asteph (or point to your
target in the normal way), wait until guiding, and then cut and paste the fourth command or run it
as:
tcs.reposition-guide-probe RA-rate DEC-rate
This is a script which will 1) stop auto-guiding and box motion (if it was set in motion), 2) move
the star box to an optimal position on the TV screen, 3) set the telescope tracking rates to RA-rate
and DEC-rate, 4) start the box motion to the same rates, 5) move the guide probe to put the star in
the box, and 6) start differential auto-guiding.
- If this is a relatively fast target, i.e. moving more than 70" during the
time your observations take, you will have to keep an eye on the star box.
When it reaches the other edge of the TV screen, it will stop guiding. The
TCS will send warning beeps when there is 120, 90 and 60 seconds left.
Make sure you take action before guiding stops by re-running the command:
tcs.reposition-guide-probe RA-rate DEC-rate
in another sequencer window. You can do this while exposing, although it is
optimal during readout, in between exposures. This
repositions the box and the guide probe and continues differential autoguiding
without affecting the telescope tracking.
There is a limit to how many times you can reposition the guide probe due to the
limited guide probe area. If this happens, you have to start again from point 1.
- UNDER TESTING: If you used -g update you will not cut and paste the first commands listed. You get
an output filed called "hitandrun.input" which you will use for pointing and differential
tracking with updating of rates.
EXAMPLE (updating rates):
[obs@selena 70-508]$ tcs.asteph -t asteroid -g update -n 363027
6 -t asteroid -g update -n 363027
4 -g update -n 363027
2 -n 363027
cd /home/postprocess/asteph; source /home/postprocess/asteph/.venv/bin/activate; bash JPLHOR_to_NOTcat.sh -t asteroid     -g update   -n " 363027 "

Running tcs.asteph...
Your input target is                        -  363027
Your observatory is Nordic Optical Telescope, La Palma.
Today is  2024-10-15
Your computer says time is  12:53  UTC.
Retrieving data from JPL Horizons for rate updates...
Retrieving data from JPL Horizons...
Data retrieved successfully from JPL Horizons.
The object being searched for is  363027_1998_ST27
Prefix for file names will be  2024-Oct-15.363027_1998_ST27
Writing hitandrun file for update
***************************
These tasks should be given to the TCS:
***************************
tcs.append-object 363027_1998_ST27-1 18 29 52.76 -50 03 56.4 2000.0 0.0 0.0 16.376
tcs.ag-off
tcs.guide-object 363027_1998_ST27-1
tcs.reposition-guide-probe -1770.36 -380.005
tmp.hitandrun.input  100% |************************************************************************************|  7451 KB    00:00
- THIS STEP IS UNDER TESTING.
The telescope resets to the sidereal tracking rates at every new telescope preset/pointing so nothing
is needed at the end of the observation.
However, for your information, you may stop the differential
guiding by tcs.box-motion-stop (or in short on the TCS UIF b-m-sto). This does not reset
the telescope tracking rates, and if you wish to stop the differential tracking, going back to normal
tracking rates, then on the TCS UIF type set-rate 0 0.
Tracking without auto-guiding. Rapidly Moving Targets
The upgraded tcs.asteph allows for this! with or without updating of the
rates. See above. Below are old manual TCS instructions.
For more rapidly moving targets, use the set-rate command on the TCS to continuously move
the telescope from a pre-calculated change in position. RA-rate and DEC-rate as above. In this mode
auto-guiding is not used.
We are also upgrading the possibilities for very fast tracking (without autoguiding), and the
software speed limit has been increased from 17"/s to more than 5000"/s. Observations were made of
fast satellites where the RA/DEC rates were updated every second.
- Preset to your object.
- Set the rate of change by set-rate RA-rate DEC-rate (rate in arcsec per hour). The
maximum differential rate is 20 000 0000 arcsec/hour (≈ 5500 arcsec/s).
- Make the exposure.
- Reset by typing set-rate 0 0 on the TCS.
For Experts Only
If the target has an unknown or rapidly changing motion, you might
want to adjust the rate of change in RA and DEC while tracking. Use
the set-rate command on the TCS and use command recall with the
up/down keys and edit the set-rate.
- Preset to object.
- Guess the starting set-rate RA-rate DEC-rate values.
- Do as described above with command recall.
- Do set-rate 0 0 or just preset to another object.
| Back to Top |
Back to Title page |
Back to NOT homepage |